Securing URLs adds a layer of security to your assets, by blocking anyone who doesn't have access to your account from altering the URLs. This helps prevent your Sources from being used maliciously—for instance, to produce unwanted renders or as a CDN for a separate site.
imgix recommends securing all URLs that are used to serve your assets. Although we don't require that Amazon S3, Google Cloud Storage, Microsoft Azure, DigitalOcean, Cloudflare R2, Wasabi, Linode, and Web Folder Sources be secured, it is a requirement for Web Proxy Sources.
To secure an asset URL, we use a cryptographic hash function called "MD5" to combine the original URL with a unique token that we generate for each secure Source. The result of this hash function is then appended to the end of your unsigned URL with the s parameter, creating a signed URL.
If the path or parameters of your URL are altered after the s parameter has been set, the altered URL will return a "403 Forbidden" code instead of an asset. This prevents unauthorized parties from changing the parameters on your URLs, but it also means that if you need to change the parameters yourself, you'll need to re-sign the new URL.
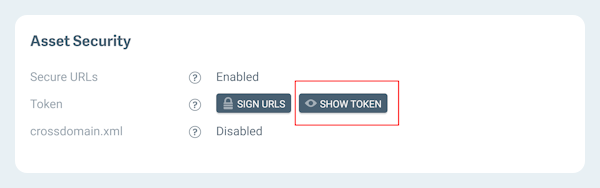
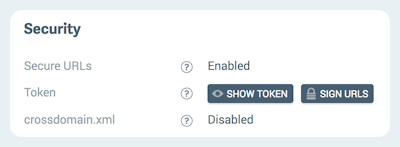
You can find your secure URL token by going to the Security section of your source and clicking on the button that says Show Token. This will only be available for Sources that have Secure URLs enabled, which will be explained in the following section.
If your secure URL token has been exposed, we recommend creating an identical secured Source, then cutting over to the new Source. This will allow your current URLs to continue working until you decide enough time has passed to deactivate the old Source.
Enabling Secure URLs
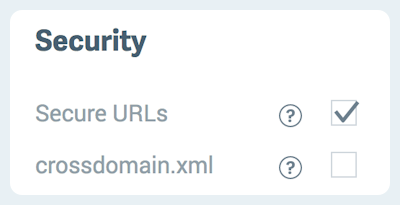
Before an asset URL can be signed, the Secure URL option must be enabled in your Source. Web Proxy Sources have this turned on automatically, and you can turn it on for your Amazon S3, Google Cloud Storage, Microsoft Azure, or Web Folder Sources by following these steps:
- Go to the Sources page and click View for the Source you'd like to update.
- In the Configuration section, click Edit.
- In the Security subsection, check Secure URLs.
- Click Review and Deploy at the bottom of the page.
- Review your changes and click Deploy this Config to complete the changes to your Source.
Now that the Secure URL option is enabled in your Source, URLs served from that Source must be signed. The Tools tab contains the Sign Asset tool that will append the signature to the end of the query string. See the next section for instructions on using this tool.
Securing Assets on a Per-Asset Basis
Once Secure URLs are enabled, you can sign individual assets by clicking the Sign URLs button on your Source's detail page.
Single Assets
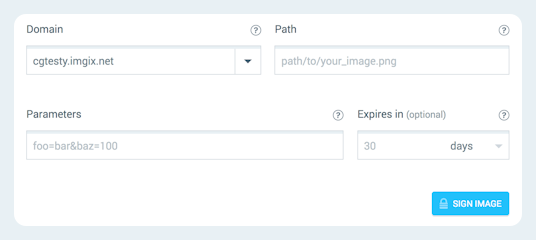
- Choose the subdomain for which you want to sign assets from the dropdown menu.
- Set the path for your asset if it's in a folder within your Source.
- Assign any parameters with which you want to transform the asset.
- Set the expiration date for the signature.
- Click Sign Asset.
- The form will be replaced with your signed URL, plus a button to copy the signed URL directly to your clipboard. Use the new signed URL to serve the asset.
Multiple Assets
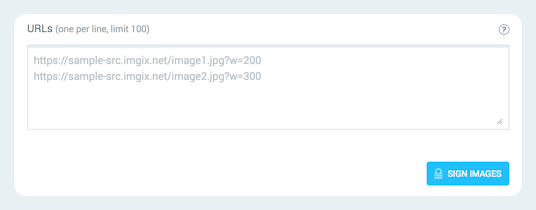
- Click the "Multiple" side of the button on the top right of the page.
- Enter the full URLs for all of the assets you want to sign, including any parameters. You can enter up to 100 URLs.
Using Tools
You can also sign asset URLs in the Sign URLs section of the Tools view.
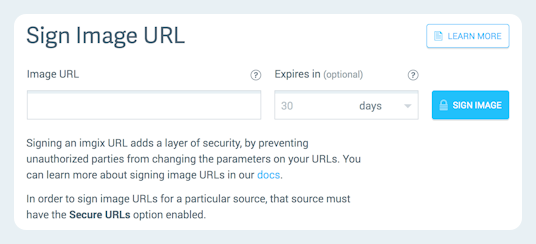
- Enter the fully-qualified URL of your asset. If the asset is an image, include any parameters you want to transform the image with. See the Rendering API Documentation for instructions.
- Set the expiration date for the signature.
- Click Sign Asset.
- The form will be replaced with your signed URL, plus a button to copy the signed URL directly to your clipboard. Use the new signed URL to serve the asset.
To sign another URL, just click Sign Another Asset.
Expiring URLs
URLs can be given an expiration date via an expires parameter that takes a UNIX timestamp in the query string. For example:
?expires=1477789261
This UNIX timestamp translates to 10/30/2016 1:01am (UTC time). Requests made to this URL after that time will output a 404 status code. When the request is made before the expiration date, the Cache-Control header of the image is replaced with the amount of time left until the expiration date, in seconds. With the same expires value, when the current time is 10/30/2016 1:00am (UTC time), the header will output Cache-Control: max-age=60.
Because the timestamp can be changed freely in the query string, we recommend signing assets that use the expires header to prohibit this behavior.
Securing Assets in Your Application
For securing assets within applications or websites at scale, we strongly recommend using one of the imgix client libraries. This ensures that you will always be up to date with the latest issues in any given language. Although the Rendering API is simple, there are a few corner cases that are not always apparent.
If a client library is not available in your language, please see the Securing URLs section of the imgix library blueprint document.