Object Removal
object-removal-rect
Enabling Capability
This parameter can be disabled/enabled in the Advanced Settings of your Source.
All rendering capabilities are enabled by default.
The object removal parameter allows you to select and remove parts of an image using AI.
Usage
object-removal-rect accepts four integers represented in this order: x,y,w,h. These values represent the coordinates of a rectangle which is used to select objects in an image.
Those values represent the following:
x: The longitude coordinate relative to the original image’s widthy: The latitude coordinate relative to the original image’s heightw: The pixel width of the rectangle relative to the original image’s widthh: The pixel height of the rectangle relative to the original image’s height
By specifying the x, y, width, and height, you can define a rectangle coordinate to process object removal over an image.
Note that these coordinates are relative to the original image’s dimensions. Resizing an image will not change the rectangle’s x,y,w,h position, even if you change the image’s aspect ratio or size using the size parameters. This means you can remove any object based on the original image’s dimensions, and no matter how you crop or scale the image, the same objects will be removed.
You can define multiple rectangle coordinates over an image by separating them with a semicolon (;).
See our Image Editor documentation to remove objects using a point-and-click user interface in the Asset Manager.
Object Removal Use Cases
Logo Replacement
In this tutorial, we’ll demonstrate how to remove a logo from an image using the object-removal-rect parameter, and then seamlessly blend a new logo into the same image using blend parameters.
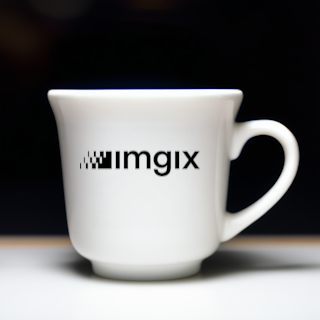
This is the original image containing the logo:
https://assets.imgix.net/cup-with-a-logo.png

Step 1: Remove the Existing Logo
Use the object-removal-rect parameter to specify the rectangular area containing the logo. The format is:
https://assets.imgix.net/cup-with-a-logo.png?w=320&h=320&object-removal-rect=302,415,307,307
This URL removes a square region (307x307 pixels) starting at position (302, 415).

Step 2: Blend in a New Logo
Now add a new logo using the blend64 parameter, which allows for base64-encoded URLs, along with positioning and style attributes.
https://assets.imgix.net/cup-with-a-logo.png?w=320&h=320&object-removal-rect=302,415,307,307&blend64=aHR0cHM6Ly9hc3NldHMuaW1naXgubmV0L3ByZXNza2l0L2ltZ2l4LXByZXNza2l0LnBkZj9wYWdlPTMmZm09cG5nJnc9MTYwJmRwcj0y&blend-w=120&blend-x=80&blend-mode=normal

AI Composition
The Rendering API processes multiple AI transformations asynchronously and requires a few seconds to complete. When present, multiple AI transformations get rendered in this order:
Read this tutorial to learn more about chaining AI transformations.
Questions
Please get in touch with your Account Manager or Support with any questions or feedback.


