Adding a Cloudflare R2 Source
Cloudflare R2 Source connects to an existing Cloudflare R2 Object Storage. Imgix connects using the credentials you supply, so your Cloudflare R2 assets don’t have to be public.
Setting Up Your Cloudflare R2 Source
-
Go to the Sources page in the Imgix dashboard and click the New Source button.
-
Select Cloudflare from the How do you store your media? radio options.
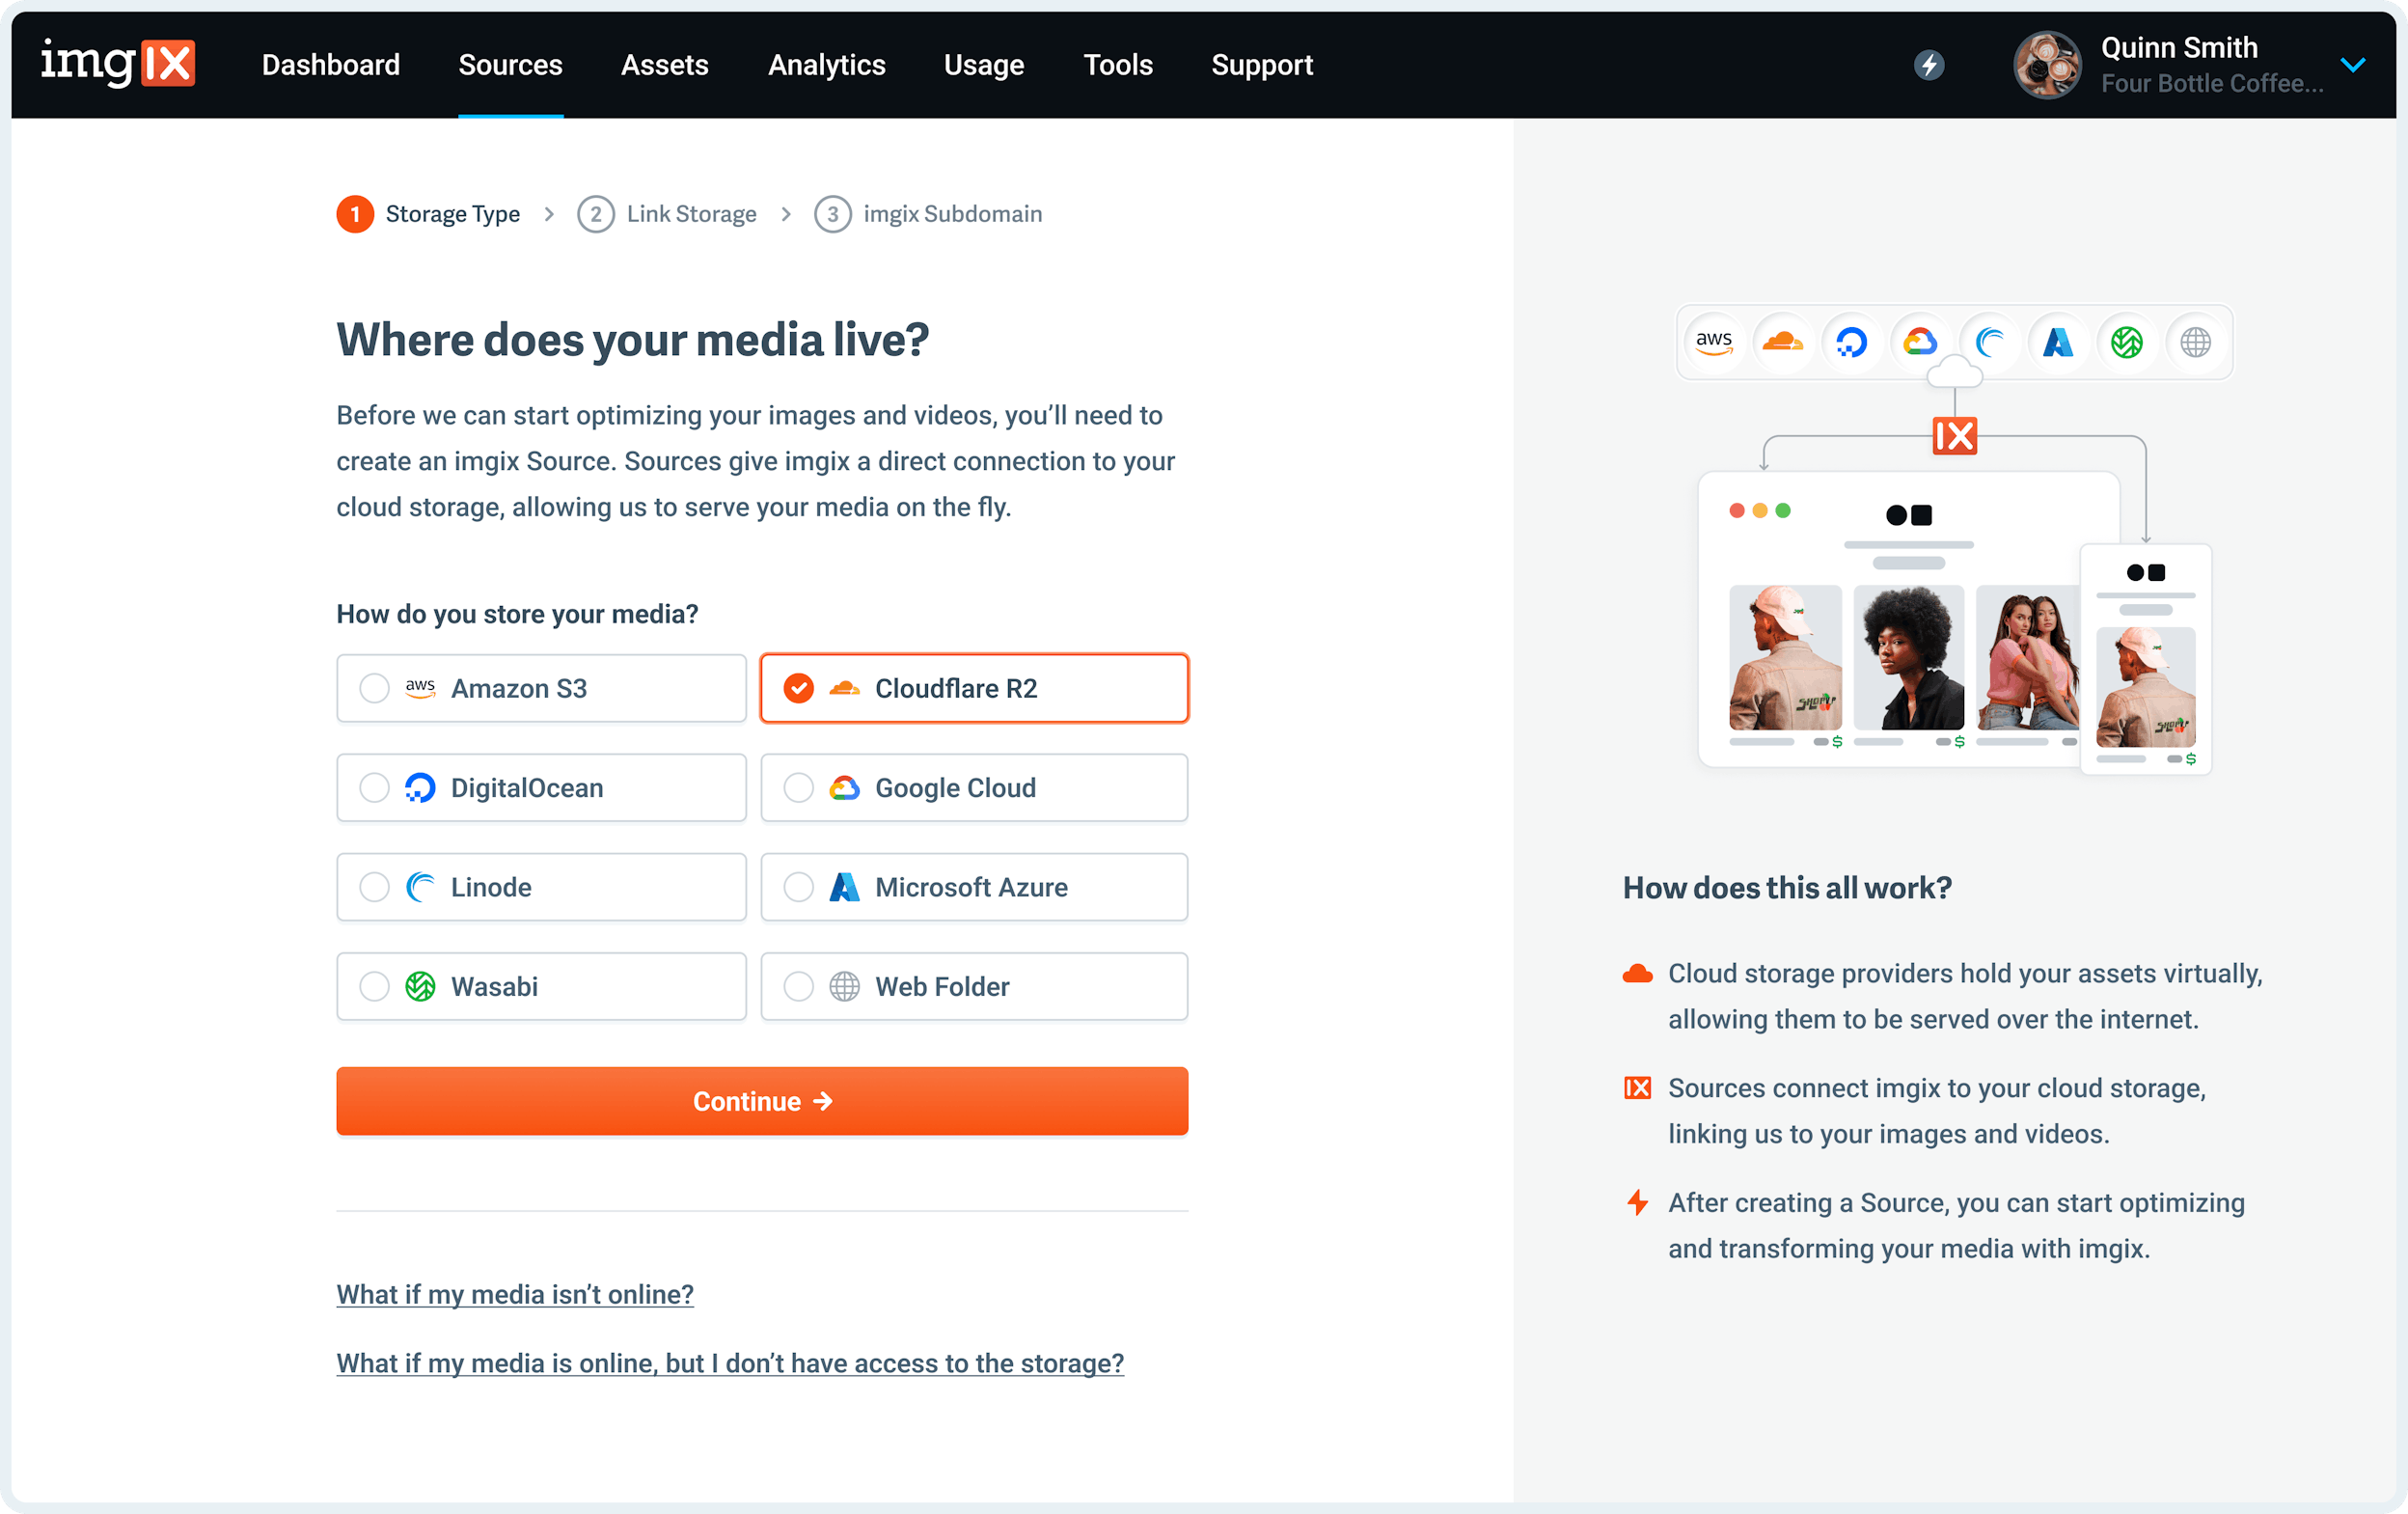
- Fill in the details for your Cloudflare R2 Source.
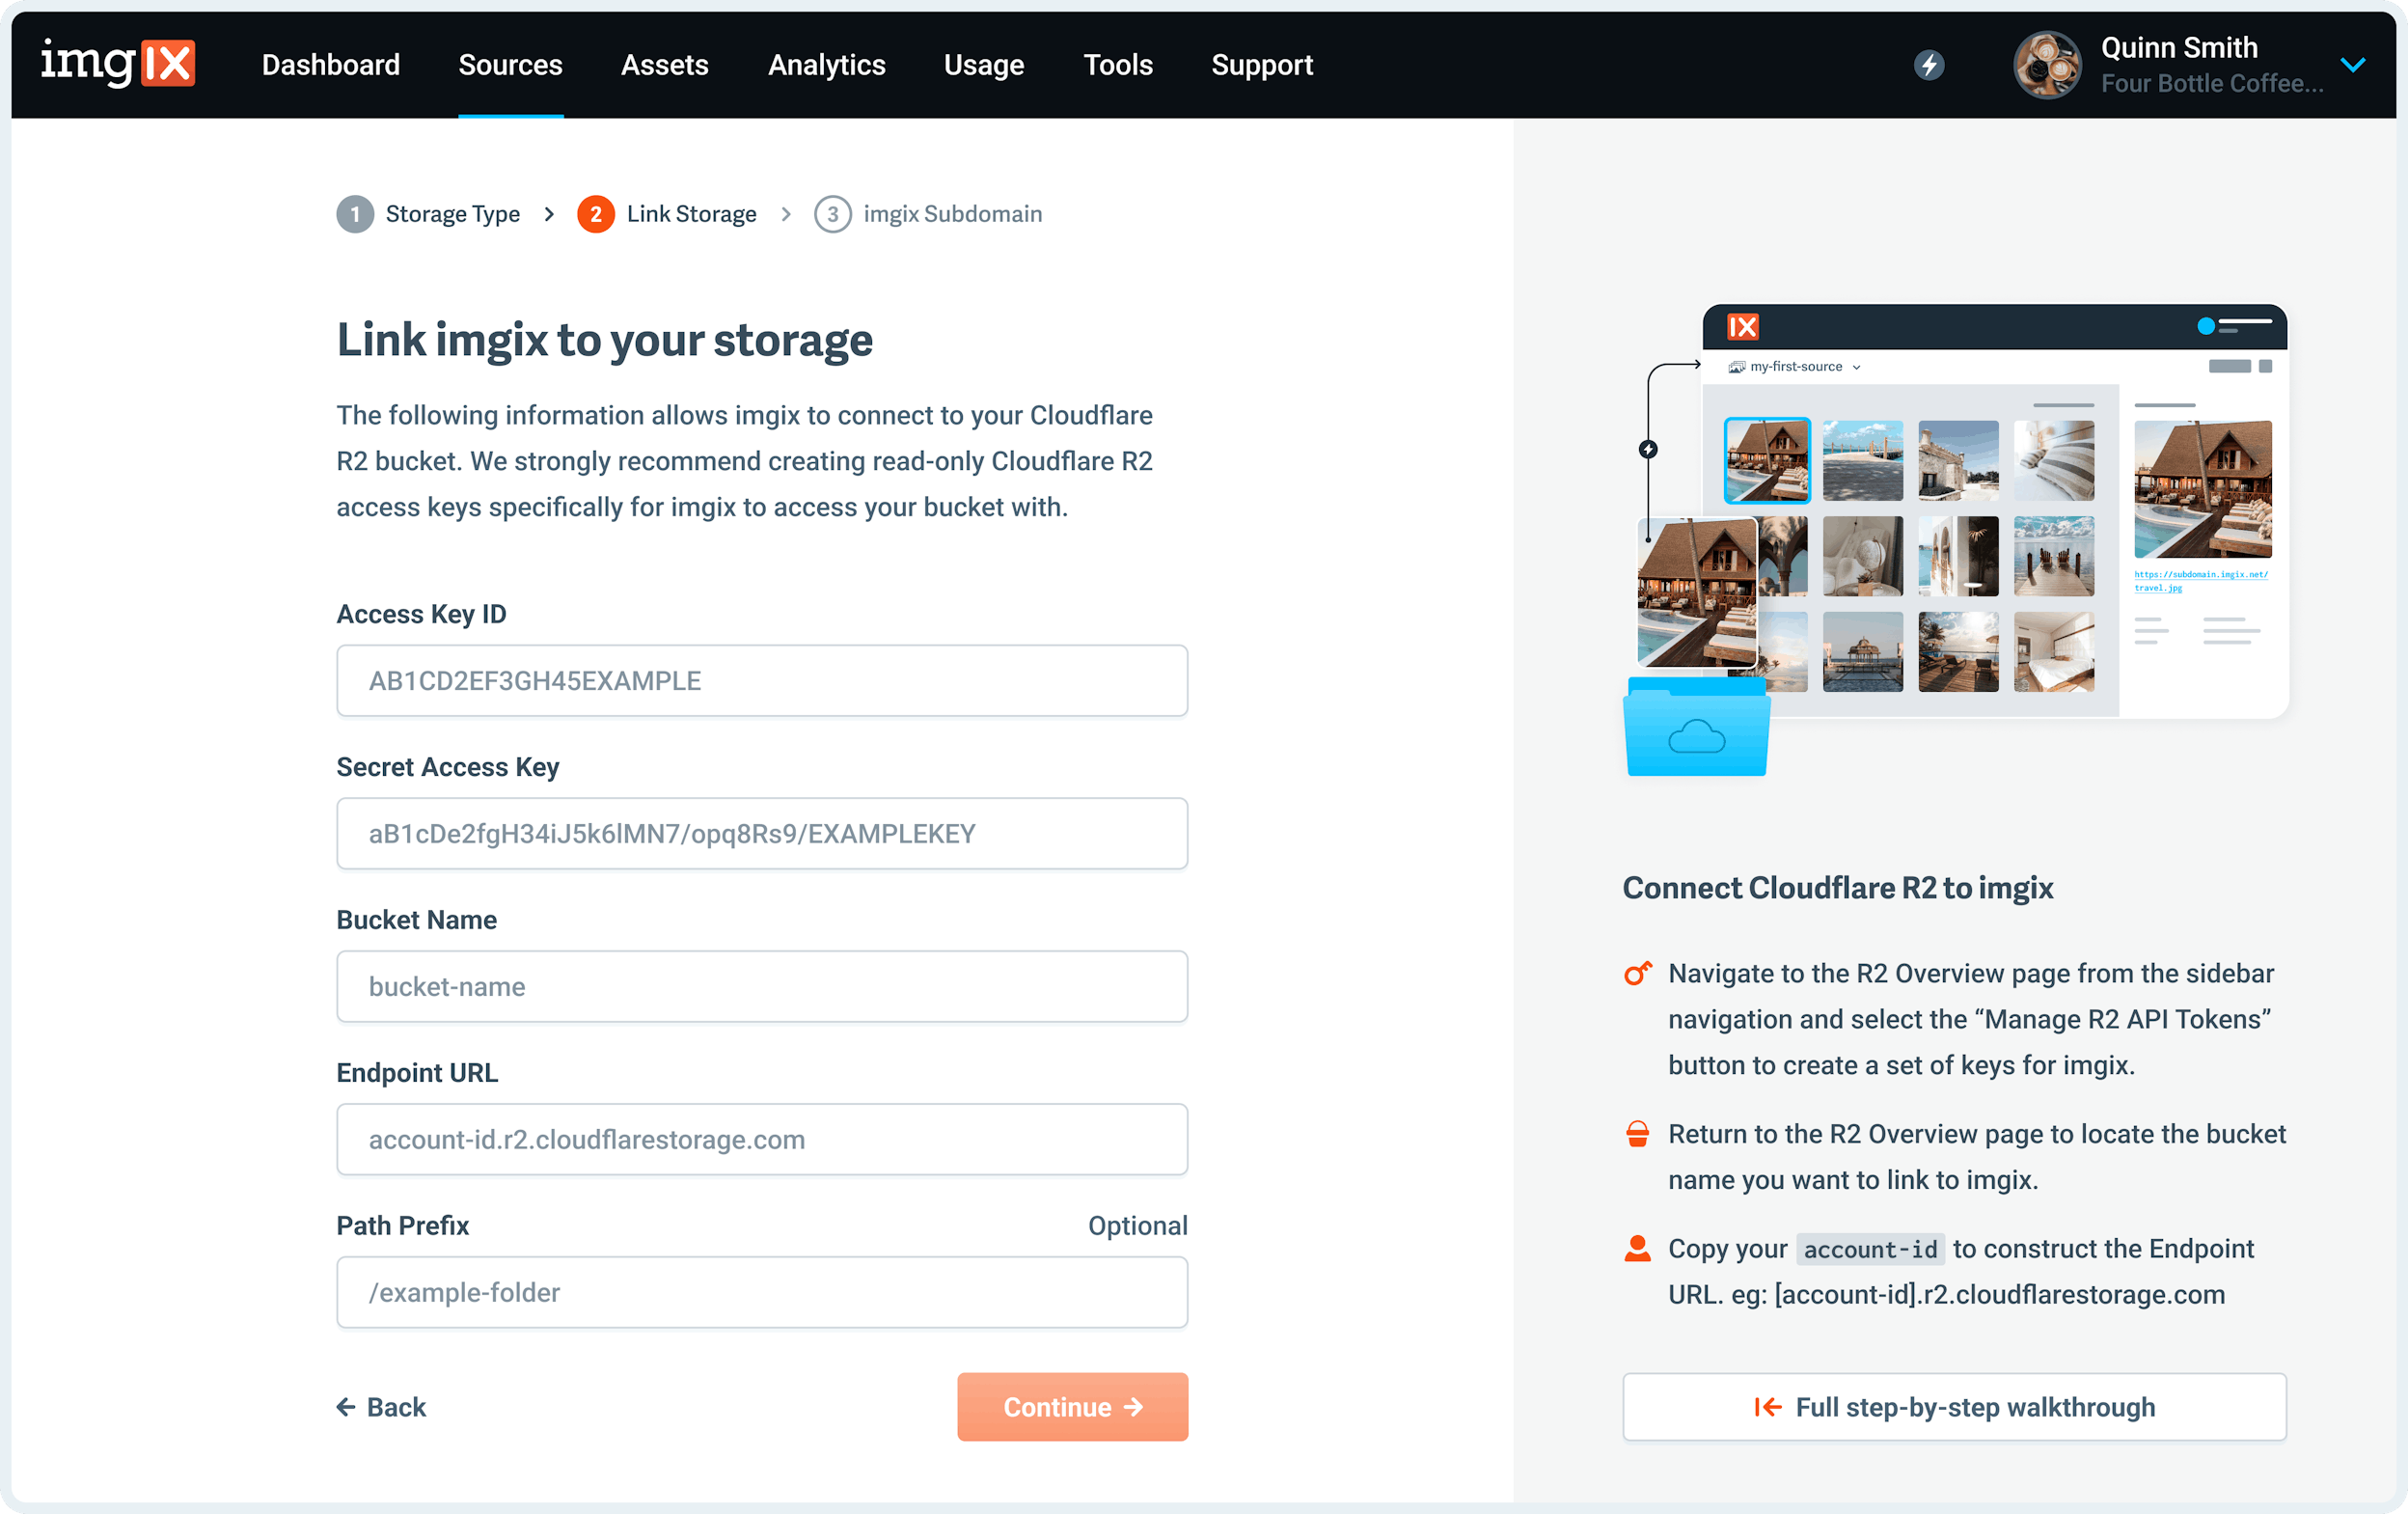
Note: We strongly recommend creating R2 access keys specifically for Imgix to access your R2 Object Storage with. Keep in mind that Imgix only requires Admin Read and List permissions to begin serving your assets. For more information on how to generate your Access and Secret Access Keys or where to find other bucket details see the Cloudflare R2 Guide documentation.
- Access Key ID: The Cloudflare R2 access key of the
deployment credentialsyou want Imgix to connect with. - Secret Access Key: The Cloudflare R2 secret key of the
deployment credentialsyou want Imgix to connect with. - Bucket Name: The name of the Cloudflare R2 Object Storage containing the assets you want Imgix to connect to.
- Endpoint URL: The S3 endpoint URL used by Cloudflare R2.
- Region: The region of Cloudflare R2. The only acceptable value is
auto. - Path Prefix (optional): The folder prefix you want to resolve to (if it exists). The prefix is prepended to the asset path before resolving the asset in Cloudflare R2. By default the asset path is
/.
- Name the Subdomain you’d like to use as the base URL for your assets.
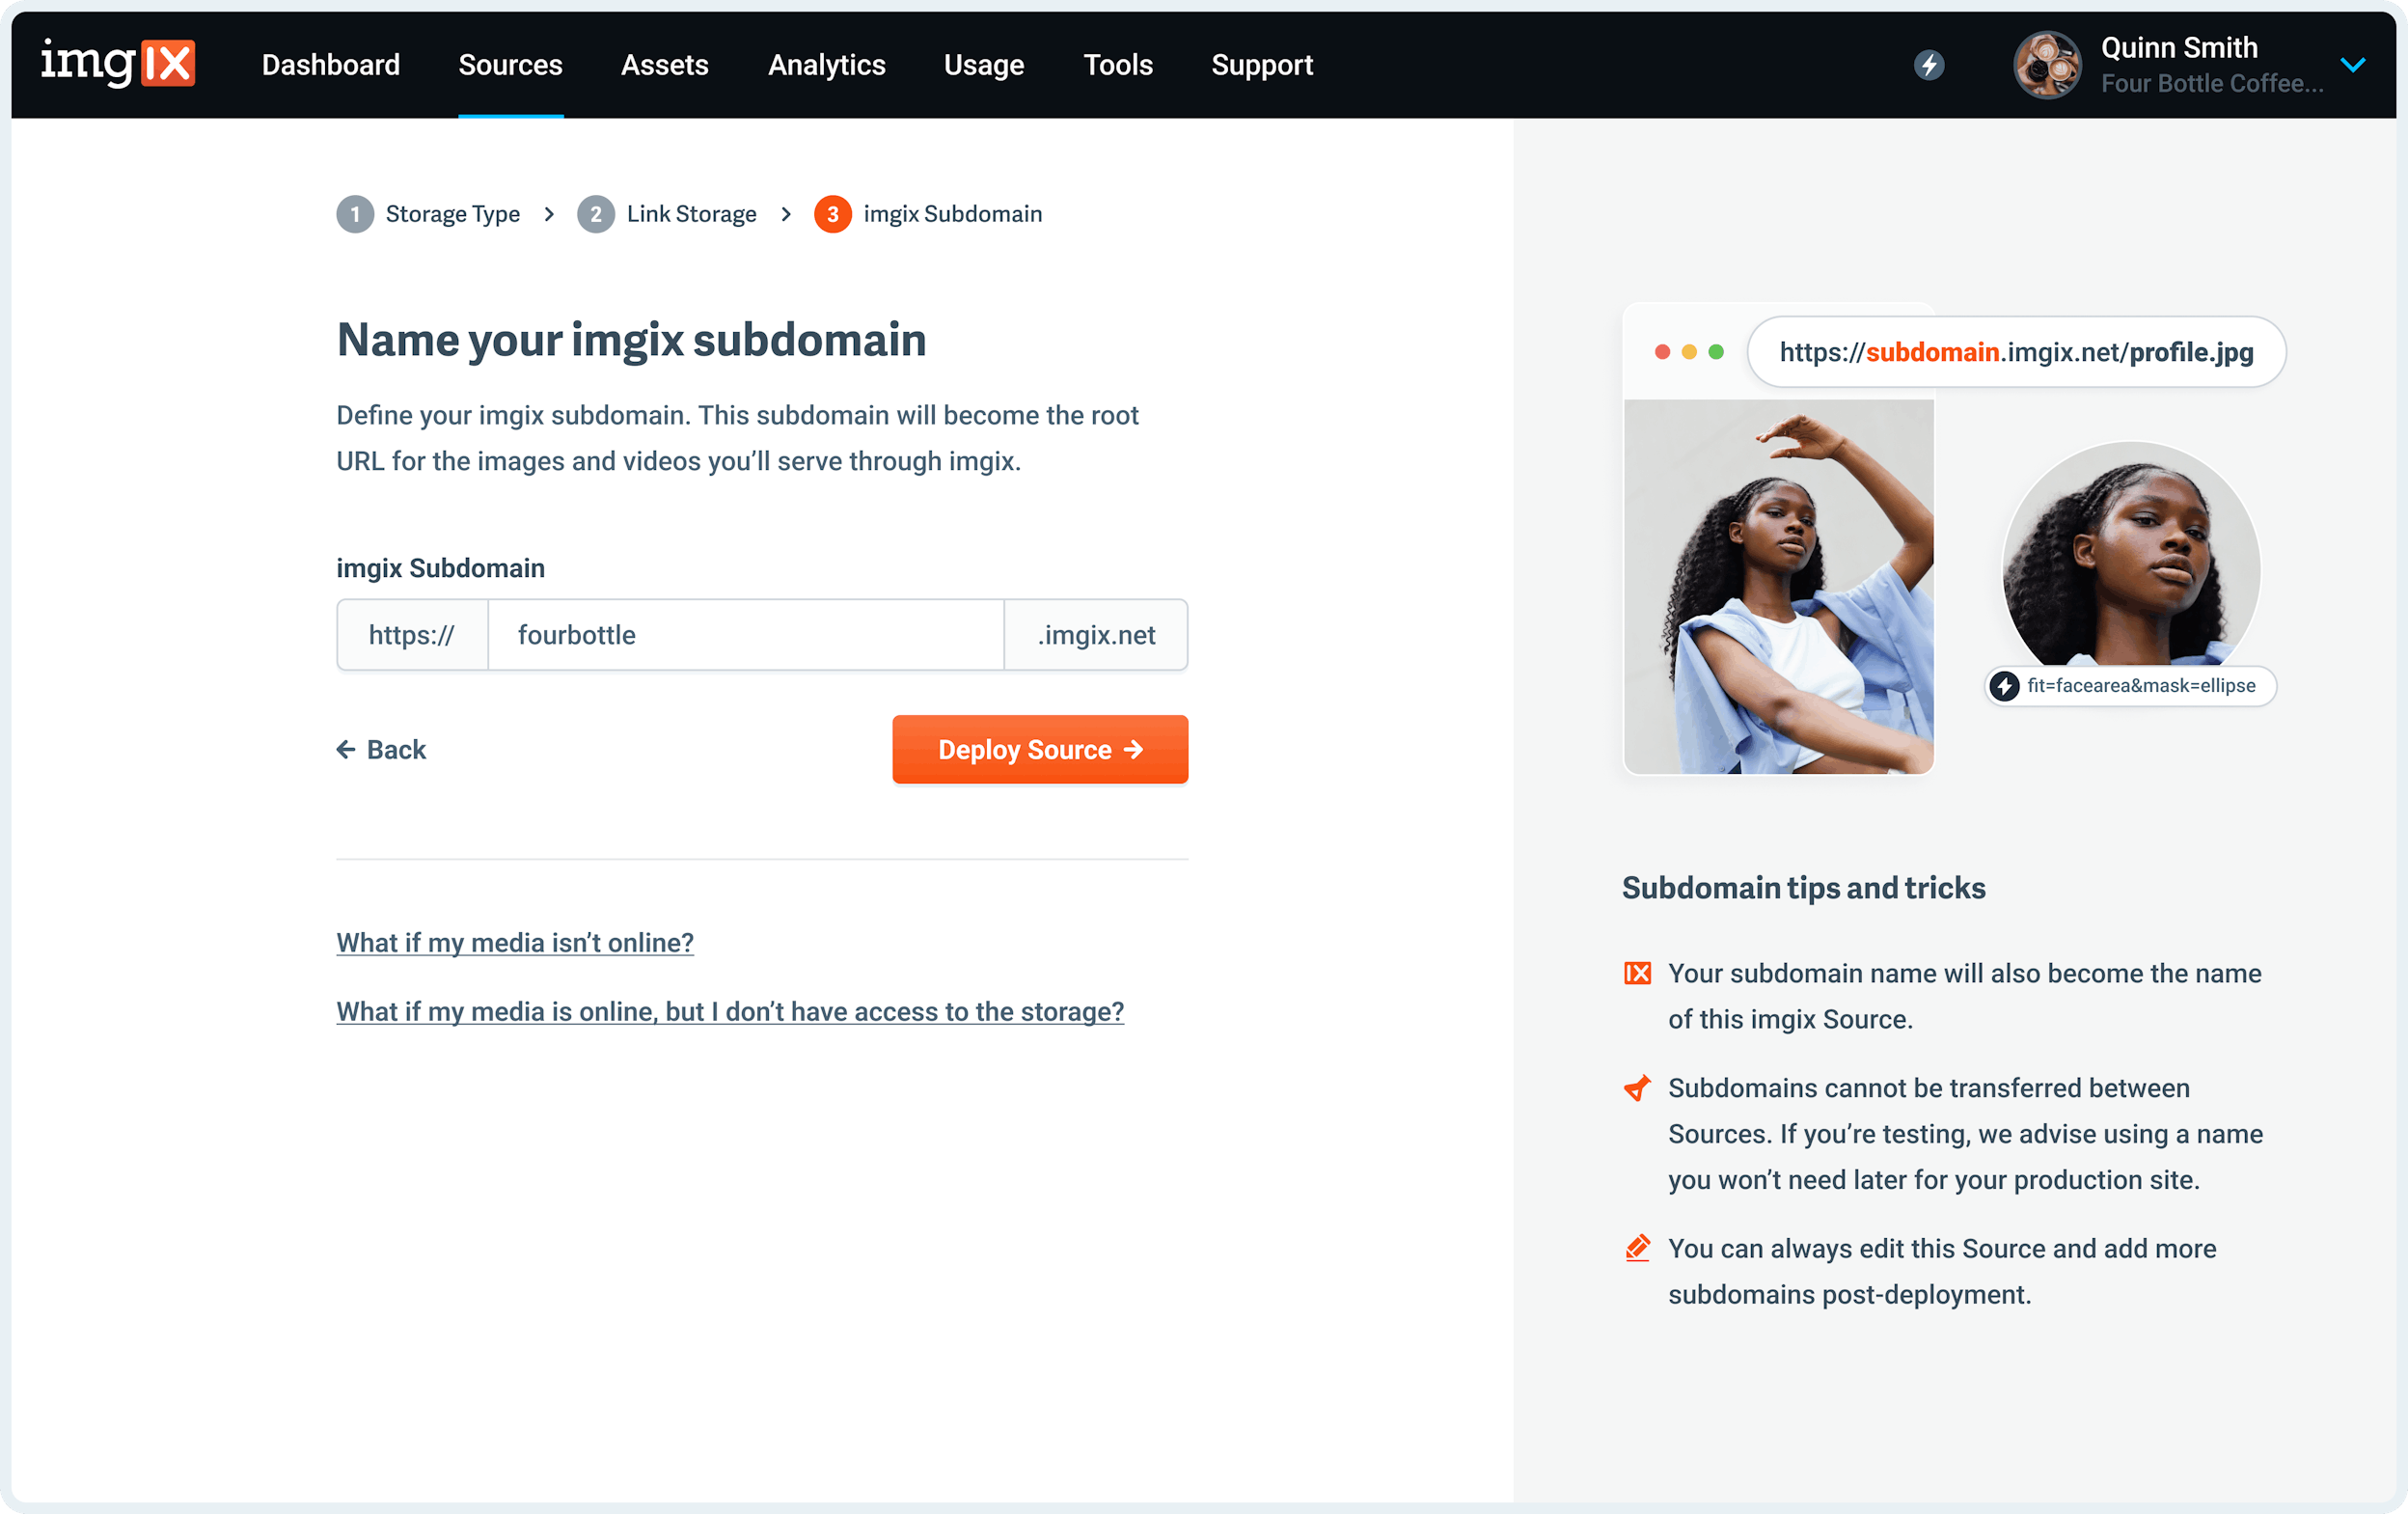
Note: The subdomain name you choose is unique to your Source and can’t be re-used. If you’re setting up a Source with a lot of customization (particularly a Custom Domain), choose the name you plan to use going forward.
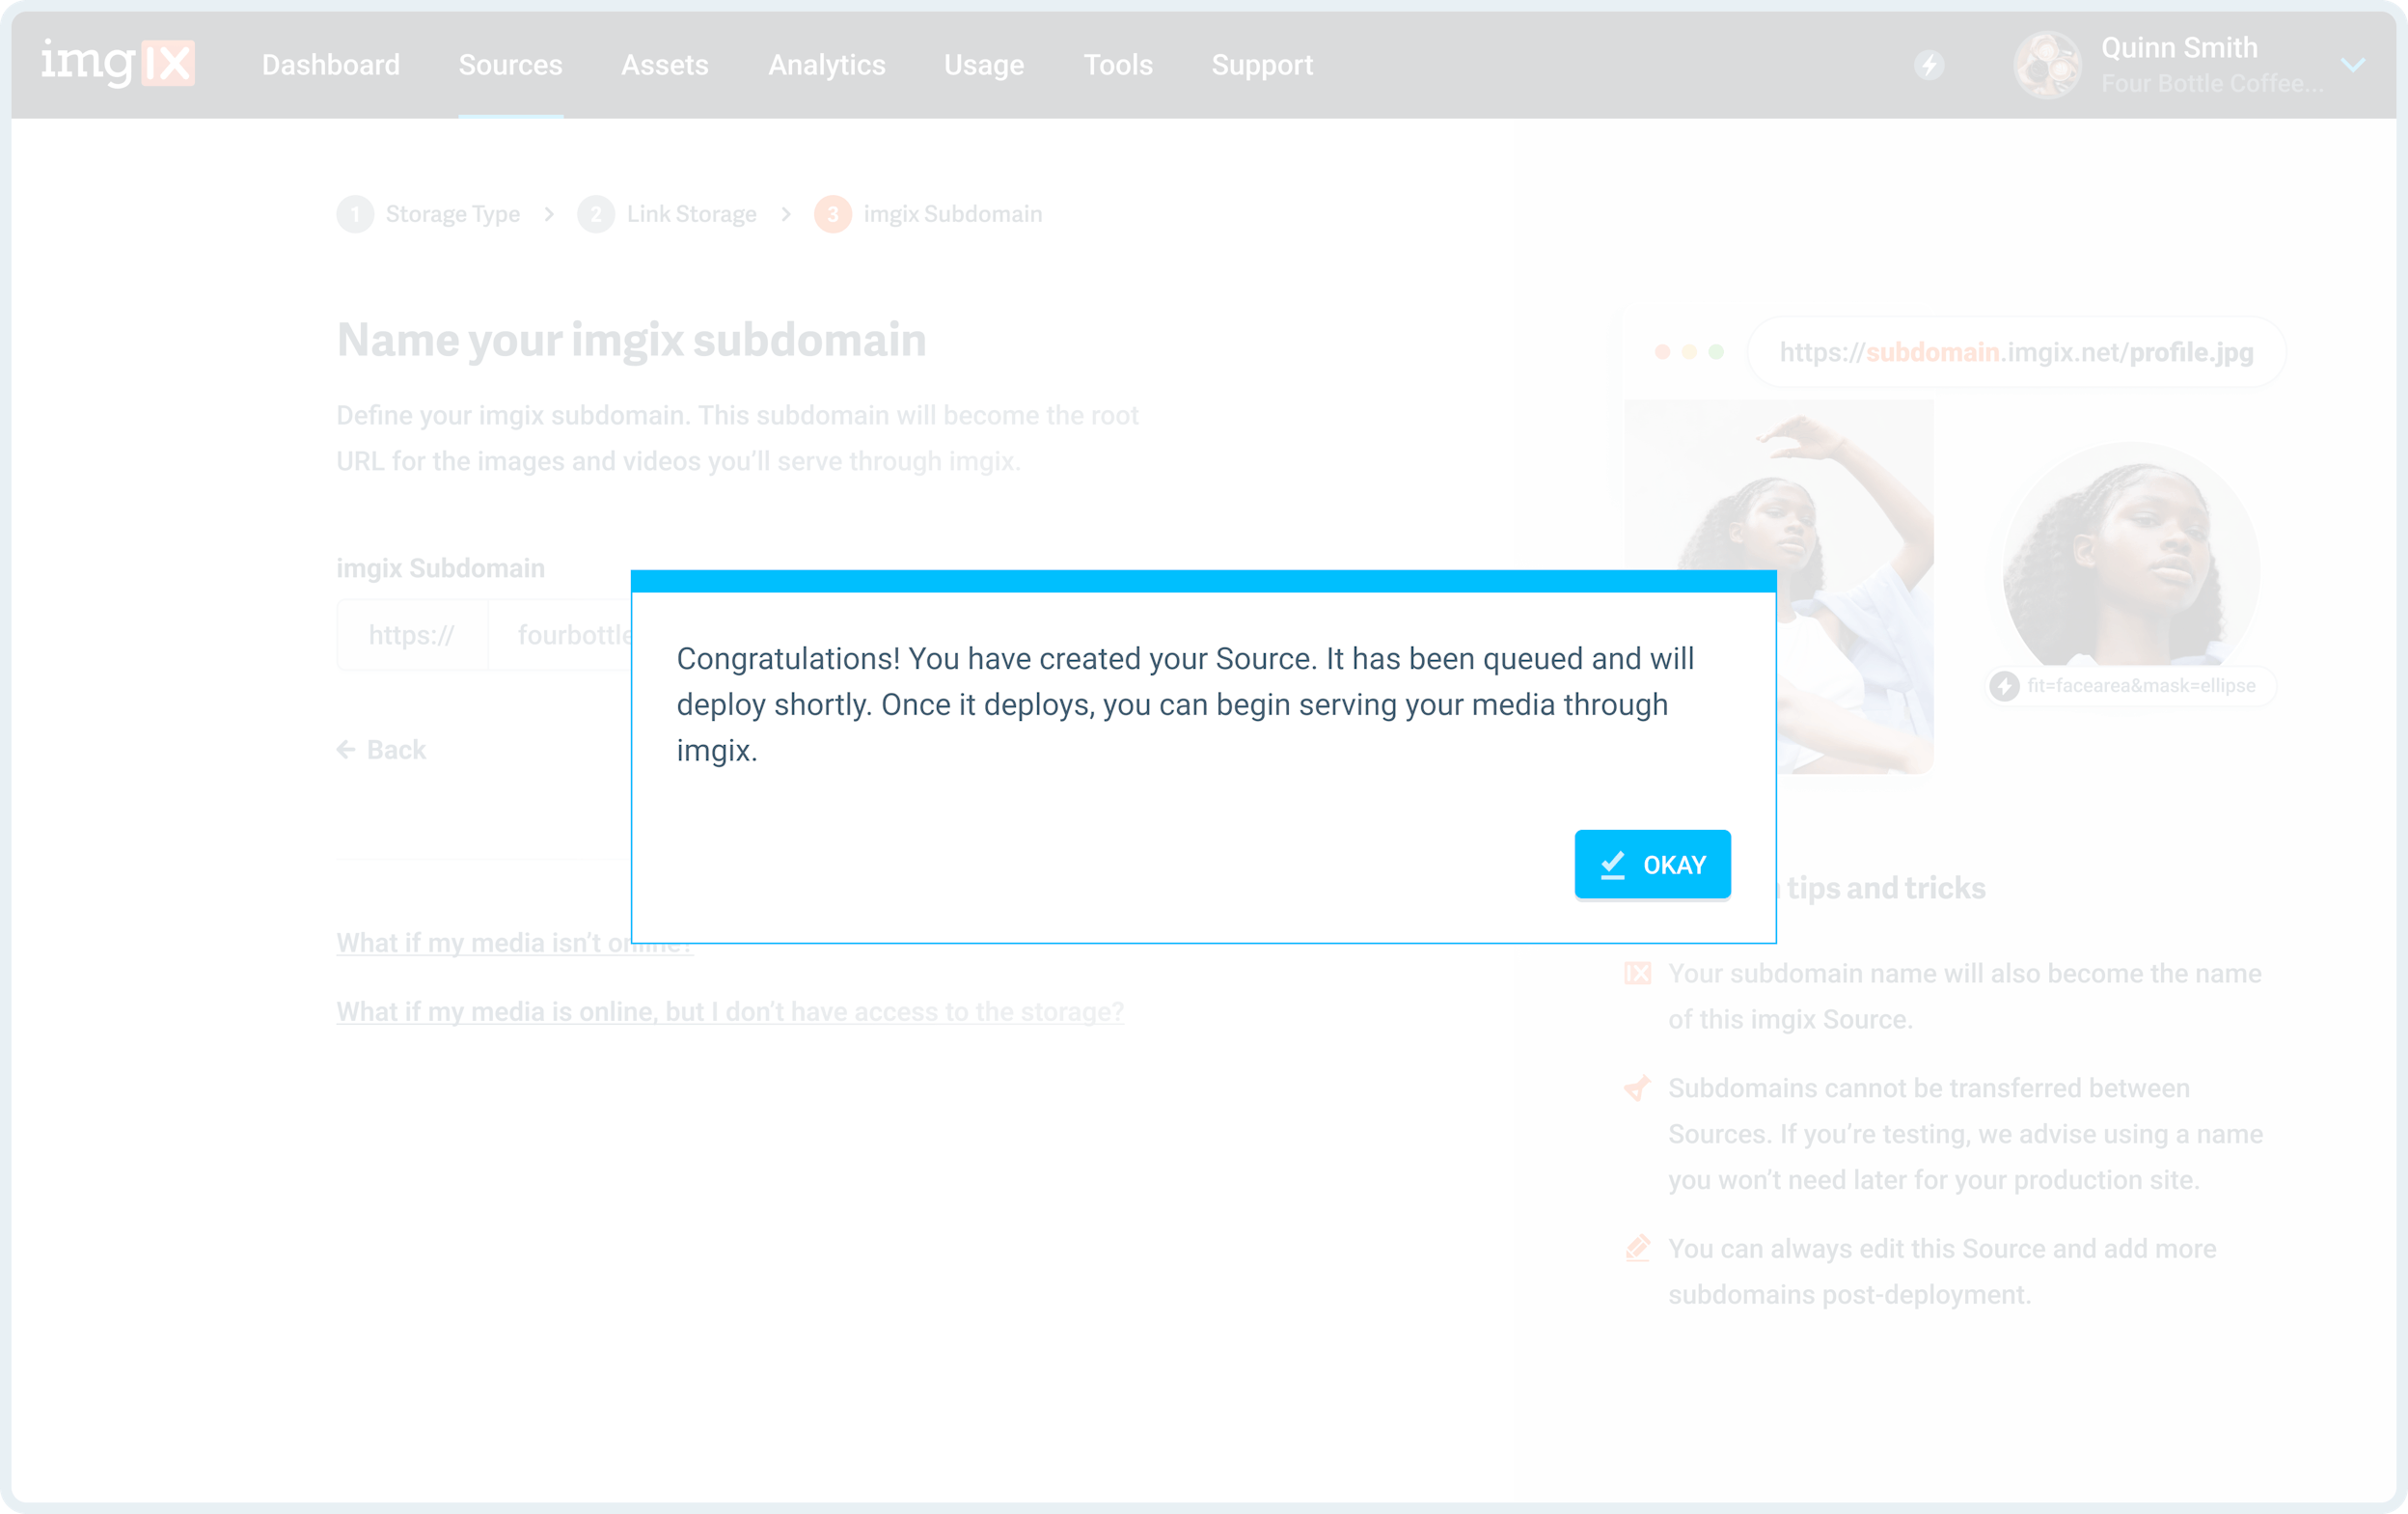
- Click the Save button on Step #3 to queue your Source for deployment.
Cloudflare R2 Guide
We strongly recommend creating R2 access keys specifically for Imgix to access your R2 Object Storage with. All Cloudflare R2 credentials are stored using industry standard cryptographic best practices.
Note: Imgix support does not have access to your credentials. Your Access Key ID and Secret Access Key are stored encrypted and cannot be retrieved or viewed by imgix staff. If you need to rotate or update your credentials, you can do so at any time from the Sources page in the dashboard.
Advanced Settings
See the Advanced Source Settings for information about setting up custom domains, defaults, and cache TTL options.
Uploading
You must follow additional steps to configure your Source to upload assets directly to Cloudflare R2. See the Uploading to Cloudflare R2 documentation for more information.