Use Imgix with localhost over Ngrok:
A Step-by-Step Guide
Occasionally you might want to test or experiment with Imgix using images that aren’t uploaded to a public cloud storage provider.
Let’s assume you have your home server, a raspberry pi or simply images on your local machine you’d like to use.
One option to serve these through Imgix, is using ngrok.
Ngrok allows you to proxy forward your locally run app to the public internet over a URL, which you can configure as the base for a Web Folder source.
Steps:
Install ngrok
Install ngrok on your machine by following their installation guide.
Prepare your local app
For demonstration purposes, let’s look at a simple example using express with the following structure:
- app.js
- imgix-logo.png
const express = require("express")

const app = express()
const port = 3000

app.use(express.static("public"))

app.get("/", (req, res) => {
  res.send("<h1>Welcome to our local App</h1>")
})

// Start the server
app.listen(port, () => {
  console.log(`Server is running on http://localhost:${port}`)
})
Start your app on localhost:3000
#cd ngrok_demo_app
node app.js
Proxy local server using ngrok to get a public URL
ngrok http 3000This should output a public URL that you can use as your Imgix source.
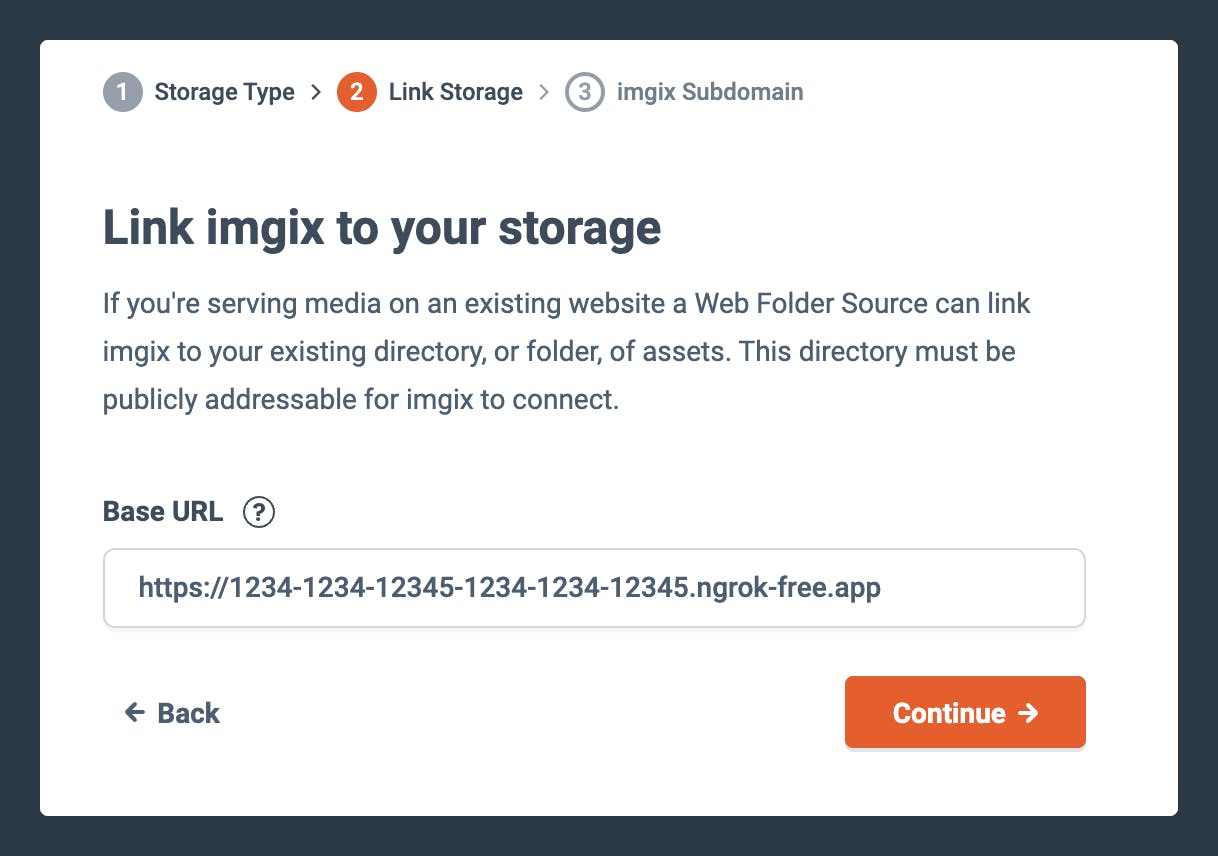
Configure Imgix Web-folder source
Navigate to the Imgix Dashboard and create a new Web Folder source. Use the ngrok URL as the Origin URL.
Finally, deploy the source.
Serve the image using Imgix
Access the image using your Imgix domain + the path to the image on your local machine.
https://example.imgix.net/imgix-logo.png?auto=format,compress&w=300