Adding a Web Proxy Source
Locked Feature
Web Proxy Source is currently available for Imgix customers on certain plans. If you’re interested in this feature, please contact our support team to get more information on this feature.
A Web Proxy Source allows you to connect to any asset that is addressable through an accessible URL. You provide the entire URL of the original asset in the path of the Imgix request.
Setting Up Your Web Proxy Source
-
Go to the Sources page in the Imgix dashboard and click the New Source button.
-
Select Web Proxy from the Source Type dropdown. There are no parameters for the Web Proxy Source type.
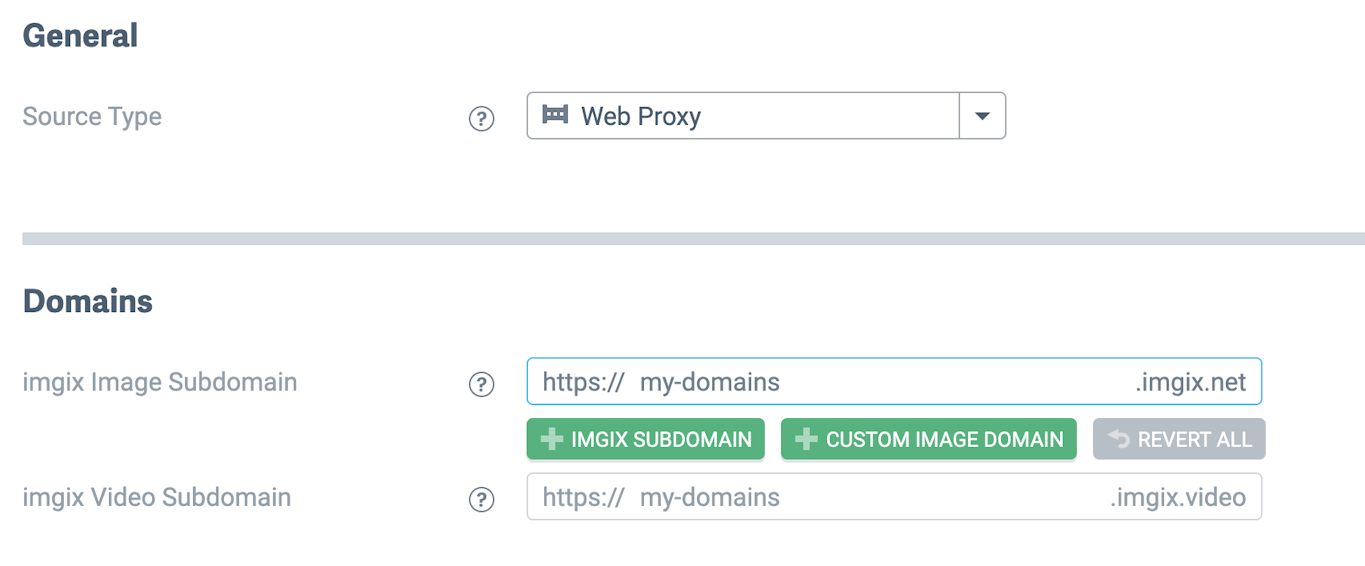
-
Name the Subdomain you’d like to use as the base URL for your assets.
- Note: The subdomain name you choose is unique to your Source and can’t be re-used. If you’re setting up a Source with a lot of customization (particularly a Custom Domain), choose the name you plan to use going forward.
- Click the Save button. Your Source will be queued for deployment and you will be directed to the Source Details page.
Security
All Web Proxy Sources require URL signing, unlike the other Source types where it is optional (note that the Secure URLs box is checked and uneditable in the screen shot above). For information on securely signing Imgix URLs, please see the Securing Assets guide.
Authenticating Requests to Your Origin
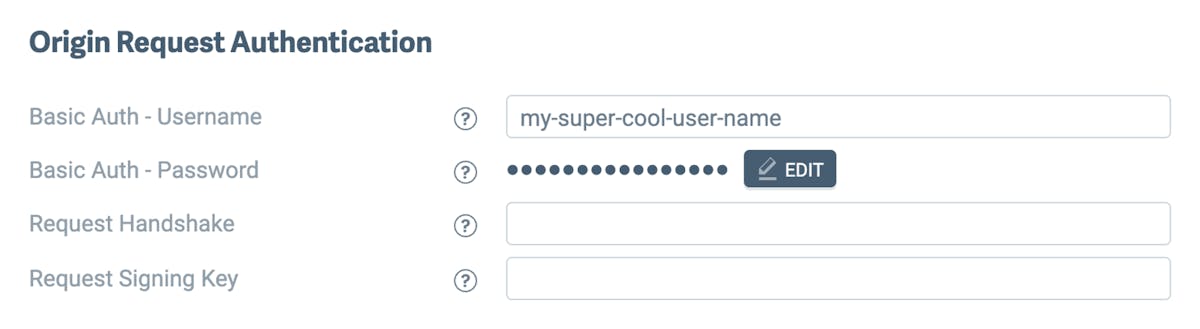
As an optional configuration step, you can set up authentication for Imgix to securely fetch assets from your Origin. There are three available options: Basic Authentication, Custom Header Authentication, and Per-Request Signing.
Once configured, Imgix will include additional headers in the request to your Origin. These header values can authenticate requests from our service, and can be configured in your dashboard.
Here is an example header sent from a Web Folder Source with Origin Authentication configured:
{
  "headers": {
    "Authorization": "Basic <base_64_encoded_username_password>",
    "X-Imgix-Signature": "<your_signature>",
    "X-Imgix-Signature-Host": "<origin_host>",
    "X-Imgix-Signature-Request-Id": "<request_id>",
    "X-Imgix-Signature-Timestamp": "<timestamp>"
  }
}- Basic Auth - Username: Username for basic authentication. Cannot contain the colon symbol (
:) symbol or control characters as per the RFC 5234 specification - Basic Auth - Password: Password for basic authentication. Cannot contain the colon symbol (
:) symbol or control characters as per the RFC 5234 specification - Request Handshake: Accepts up to 256 characters. See Custom Header Authentication.
- Request Signing Key: Accepts up to a 32 character string with latin-1 characters. Can be generated using a
bashcommand likeopenssl rand -base64 24. Used to generate a signature that will be sent as a header to your server. See Per-Request Signing.
Basic Authentication
Basic authentication is the easiest method to authenticate requests from the Imgix service to your Origin. By specifying a username, Imgix will include a Basic Authentication header in requests to your Origin. An example request looks like this:
"Authorization": "Basic dXNlcm5hbWVfZXhhbXBsZTpwYXNzd29yZF9leGFtcGxl"In the example, dXNlcm5hbWVfZXhhbXBsZTpwYXNzd29yZF9leGFtcGxl is Base64 decoded to username_example:password_example.
The username and password values must not contain a colon, as the colon is reserved for separating the username and password in the Basic Authentication header. Additionally, the username and password MUST NOT contain any control characters as per the RFC 5234 specification.
Custom Header Value/Handshake Token
Another authentication method is to configure a request_handshake value in your Source settings. The request_handshake value gets sent in a request to your Origin as a header called X-Imgix-Origin-Secret, and accepts a string with up to 256 characters. This can be used as a way to set up custom authentication by checking for the presence of this header/value in requests to your Origin.
A request to your Origin with this header value will look like this:
"X-Imgix-Origin-Secret": "custom_origin_secret_value"Per-Request Signing
An even more secure method is Per-Request signing. This allows you to use a request_signing_key to authenticate requests to your Origin. Note that while this is the most secure method available, it requires additional configuration outside of Imgix in order to decrypt and authenticate the credentials.
The request_signing_key value accepts 32 latin-1 characters.
This will take a secret 32-character value and generate an HMAC-SHA256 digest signature on the request sent from Imgix that can be verified to authenticate that the requests are coming from Imgix.
When configured, Imgix will include the following headers in requests to your Origin:
X-Imgix-Signature-Timestamp: Unix epoch secondsX-Imgix-Signature-Request-Id: An Imgix generated id for each requestX-Imgix-Signature: A version tag (v1) followed by the HMAC-SHA256 digest (all uppercase hex values) of the message<requestid>.<timestamp>.<host>.<url path>signed with the secret key given to the endpoint.
Here is an example request sent from imgix:
"X-Imgix-Signature": "v1,92b7abfb7adc9290d1f1f64d91c11a27e35126ed8c20d1cf5a45f3e8c9fc03f6",
"X-Imgix-Signature-Host": "www.examplesite.com",
"X-Imgix-Signature-Request-Id": "a3c1f07cd7f9dc17fe9352dd391aa052f90ba51df95231f09fadc760b8457564",
"X-Imgix-Signature-Timestamp": "1709332618"
You can then verify that the request is coming from Imgix by generating the HMAC-SHA256 digest of the message <requestid>.<timestamp>.<host>.<url path> with the secret key you have configured. Here is an example using the Node.js crypto module combined with the Imgix headers above:
const crypto = require("crypto")

var imgix_headers = {
  "X-Imgix-Signature":
    "v1,92b7abfb7adc9290d1f1f64d91c11a27e35126ed8c20d1cf5a45f3e8c9fc03f6",
  "X-Imgix-Signature-Host": "www.examplesite.com",
  "X-Imgix-Signature-Request-Id":
    "a3c1f07cd7f9dc17fe9352dd391aa052f90ba51df95231f09fadc760b8457564",
  "X-Imgix-Signature-Timestamp": "1709332618",
  "url-path": "/example_url.png",
}

// your secret key
var secret = "abcd1234"

// Create HMAC using SHA256 algorithm
const hmac = crypto
  .createHmac("sha256", secret)
  .update(
    imgix_headers["X-Imgix-Signature-Request-Id"] +
      "." +
      imgix_headers["X-Imgix-Signature-Timestamp"] +
      "." +
      imgix_headers["X-Imgix-Signature-Host"] +
      "." +
      imgix_headers["url-path"],
  )

// Get the HMAC in hexadecimal format
const hmacDigest = hmac.digest("hex")

// compare the rqeuest
if ("v1," + hmacDigest === imgix_headers["X-Imgix-Signature"]) {
  console.log("Request is from Imgix")
} else {
  console.log("Request is not from Imgix")
}
Authenticating Requests to Your Origin
See the Advanced Source Settings for information about setting up custom domains, defaults, and cache TTL options.