Best Practices for Creating Vector Assets
Vector assets are a great way to manage graphics that are simple and shape based, like icons and logos. With a few simple setup steps, you can greatly streamline creating these graphics on a grid and ensure that they scale cleanly at any device resolution.
This tutorial demonstrates some usage basics and best practices for setting up your vector assets with Adobe Illustrator and Sketch by Bohemian Coding for use with the Managing Brand Assets from PDFs tutorial.
We’ve highlighted some methods and approaches that help optimize vector files for rasterization using Imgix. These are suggestions and your specific project or intended output may alter the approach needed.
Using Adobe Illustrator
Document Setup
When you create a new document, it’s best to use the Web preset that Illustrator provides. From there, customize your document to your needs. From this window, you can establish a default size and ordering for your artboards. We’ll cover them more later.
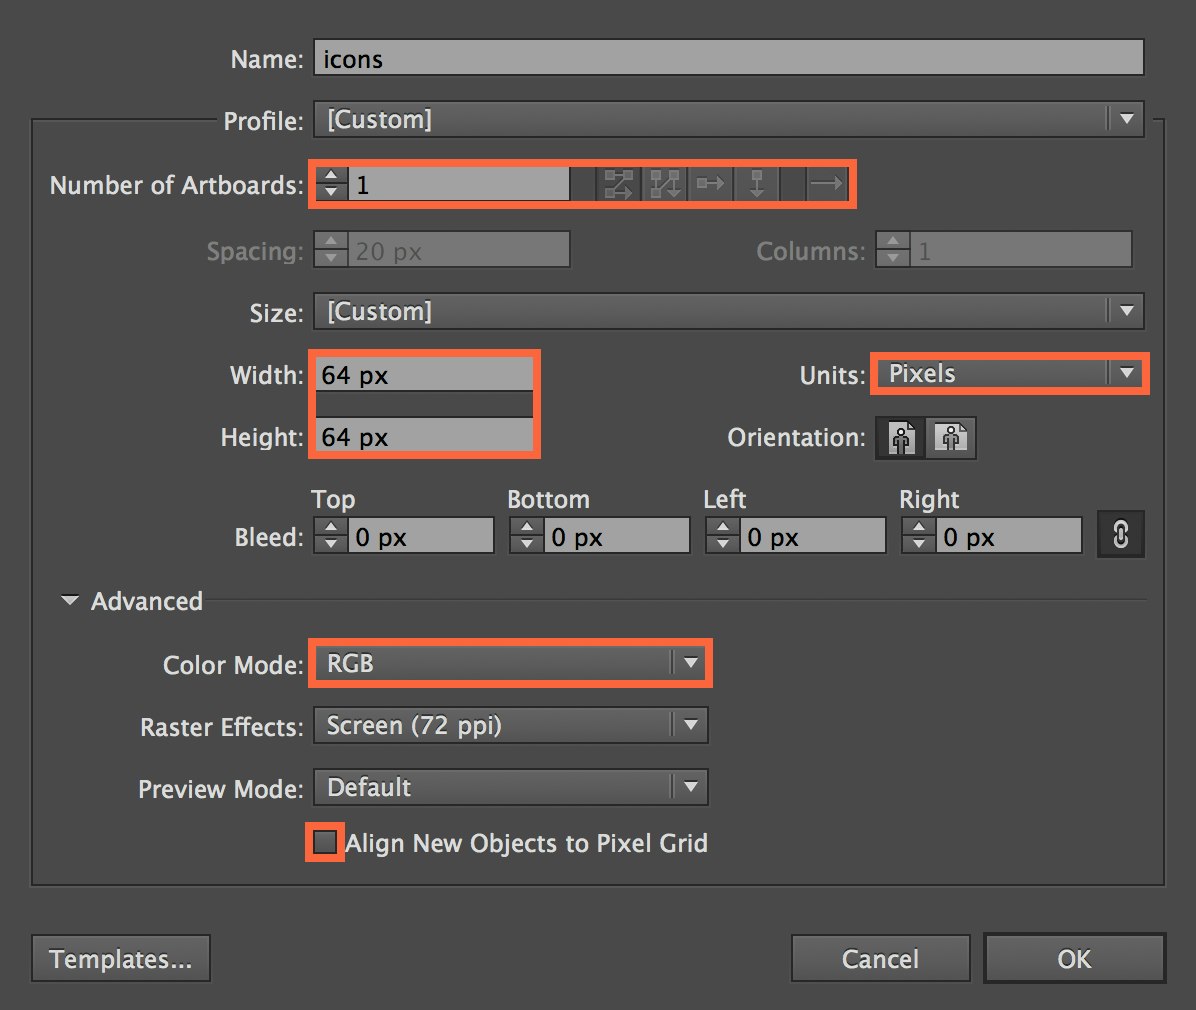
Be sure that you are working in the RGB color mode, and that your units are set to pixels. Deselect the Align New Objects to Pixel Grid option, as that may cause some unexpected issues with resizing, editing, or pasting in artwork from another file. We recommend selectively choosing which objects are directly impacted by the pixel grid from the Transform panel while an object is selected.
![]()
Summary
- Start with Web Profile
- Color > RGB
- Units > Pixels
- Deselect “Align New Objects to Pixel Grid” under “Advanced”
Grid & Units
Go to Illustrator > Preferences > Units. It’s best to set up the General and Stroke values as pixels.


Go to Illustrator > Preferences > Guides & Grid. Here, you have the ability to adjust how the grid will appear in Illustrator so you can have more control over the placement and alignment of your objects.
![]()
We recommend setting Gridline every to 2 pixels and Subdivisions to 2. This helps you snap objects to the grid and better understand your pixel placement. Everyone will work to a different scale, but it’s a starting point.
It helps to deselect Grids in Back so you can see the grid over your artwork.

If you want to have an idea how your vectors wil rasterize, you can choose the Pixel Preview option under the View menu.
Shortcuts
- Toggle Grid On/ Off: Command + ’
- Snap to Grid: Shift + Command + ’
- Toggle Pixel Preview: Command + Option + Y
Note: We recommend turning off Snap to Point when using Snap to Pixel located under the View menu.
Summary
- Work in pixels
- Set up appropriate Grid increments
- 2px Gridline, 2 subdivisions
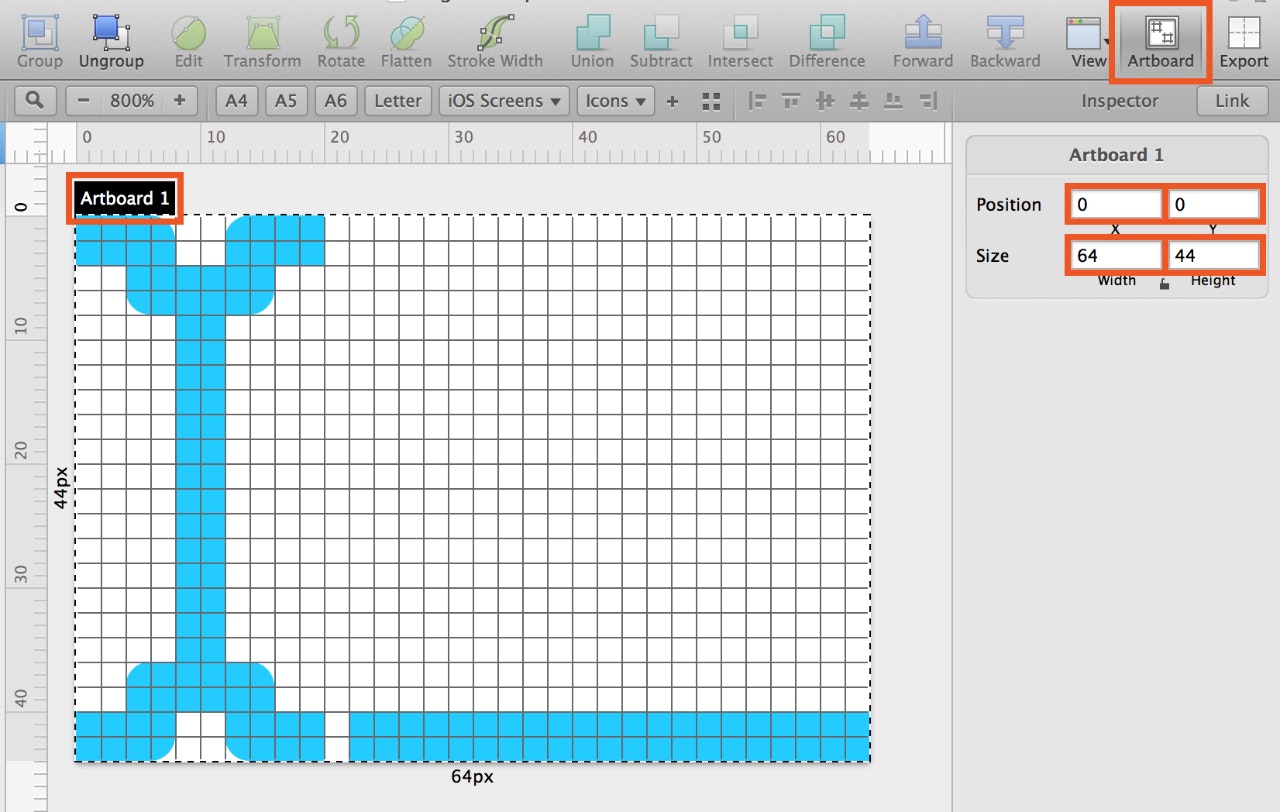
Using Artboards and the Artboard Panel
Working with artboards is an easy way to create multi-page PDFs natively in Illustrator. They are most easily accessed by the Artboard tool in the Toolbar and the Artboard panel under the Window Menu.
When in Artboard editing mode (Shift + O), you can draw new artboards in your document. They can be managed and arranged using the Artboard panel, in much the same way as layers.
Any selected artboard will have a solid, bolded black outline around it. When an artboard is selected, its properties can be adjusted using the object properties panel located just under the main menu options. These include its physical size and origin point.

The origin points should be properly managed, and exist on even and whole pixel values to ensure pixel perfection for your vector artwork.
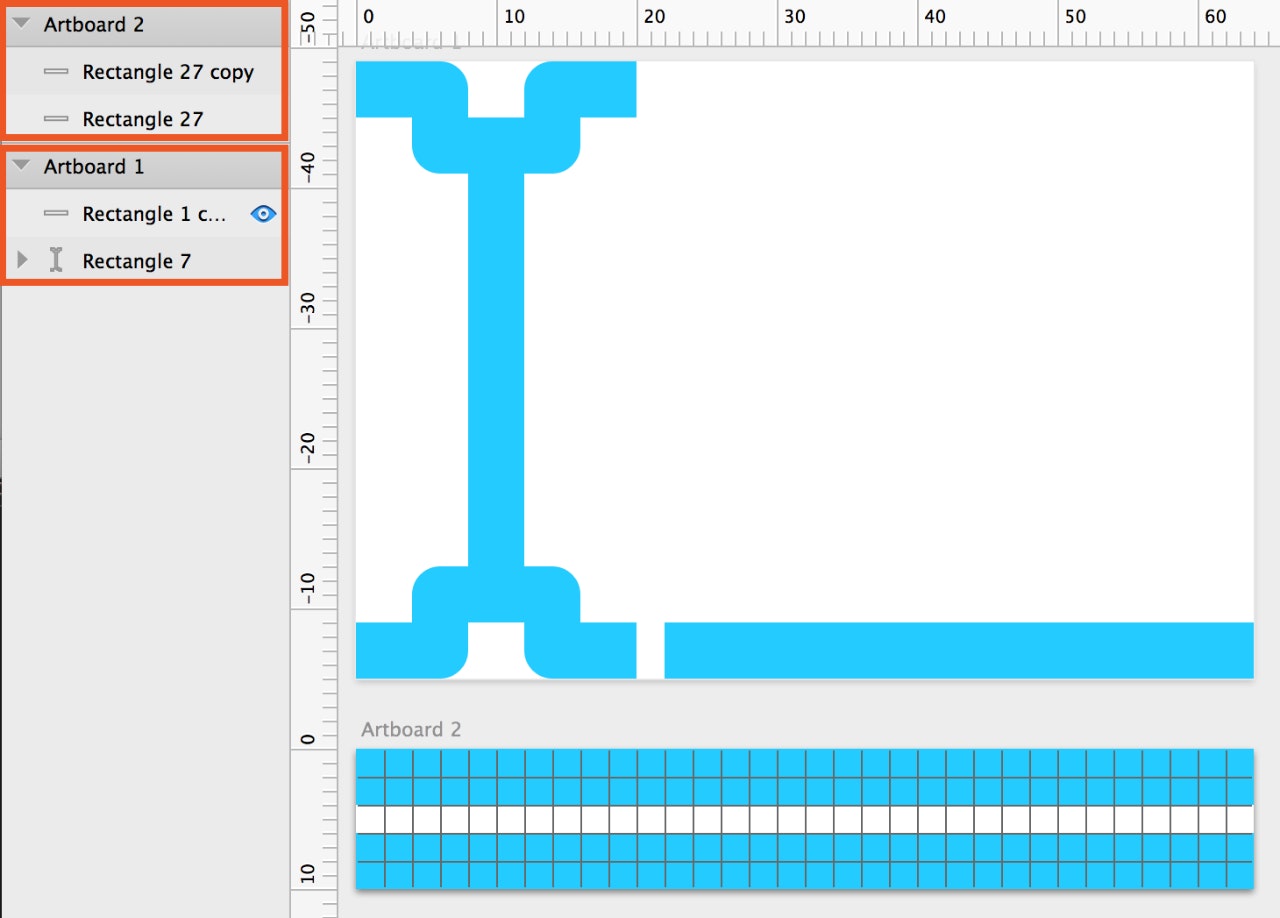
The arrangement of artboards in the Artboard panel will determine how your pages are ordered. Double-clicking on any artboard in the Artboard panel will take you directly to that artboard.

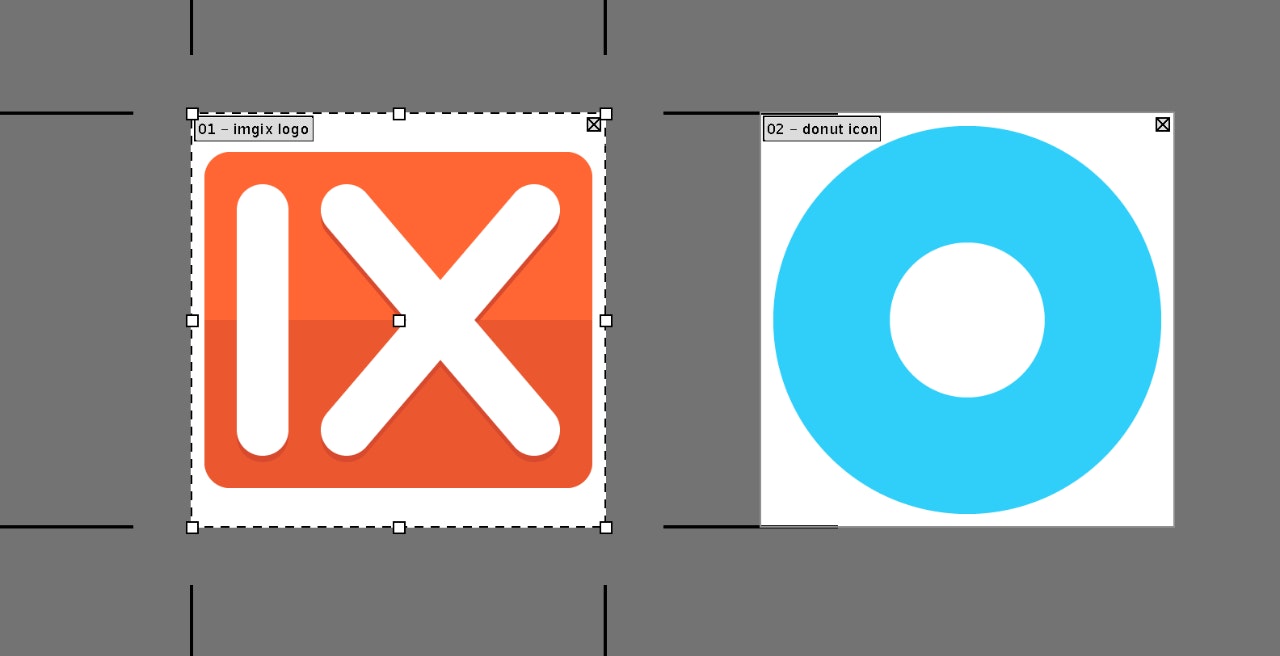
For icons, starting with 64x64-pixel artboard allows for crisp, even, and flexible scaling and subsequent raster rendering to common values of 32, 64, 256, 512, 1024px, etc. It helps to have a scaling plan in mind to help pick an appropriate starting value and multiplier.
There are additional options for managing and creating artboards under the Object menu: Object > Artboards. These options will allow you to create, downsize, and better organize and arrange your artboards. One such tool is the Rearrange Artboards option, which automates the placement and arrangement of your artboards.

Shortcuts
- Artboard Edit Mode: Shift + O
To exit this mode, press any other shortcut key—“V” for the default arrow cursor selection tool is a good choice.
Summary
- Use artboards to organize your vector assets
- Manage artboards using the Artboard panel
- Assign even, whole pixel values to artboard origins
- Use even, whole pixel values for artboard dimensions
- Have a specified scale in mind: 32, 64, 512, 640, 1024 pixels, etc.
- Use the Rearrange Artboards tool to clean up your file
Graphic Placement & Complexity
For crisp icons and branding visuals, it’s always best to work with even pixels and a good specified scale. Before you paste your artwork into a document, be wary that some of your assets or lines may have Align to Pixel Grid turned on, which may distort your elements. This option can be toggled in the Transform panel, and works on an object-by-object level. It’s better to rely on Snap to Grid while moving objects instead of Align to Pixel Grid, which may not work as desired in all circumstances.
Use the Transform panel religiously! Generally, when using the Transform panel, orienting all of the graphics from the top left is useful. This makes it much easier to resize and position them. Keeping an eye on graphics with the Transform panel will give absolute certainty of the placement of objects, and ensure that they are registered to whole even pixels.
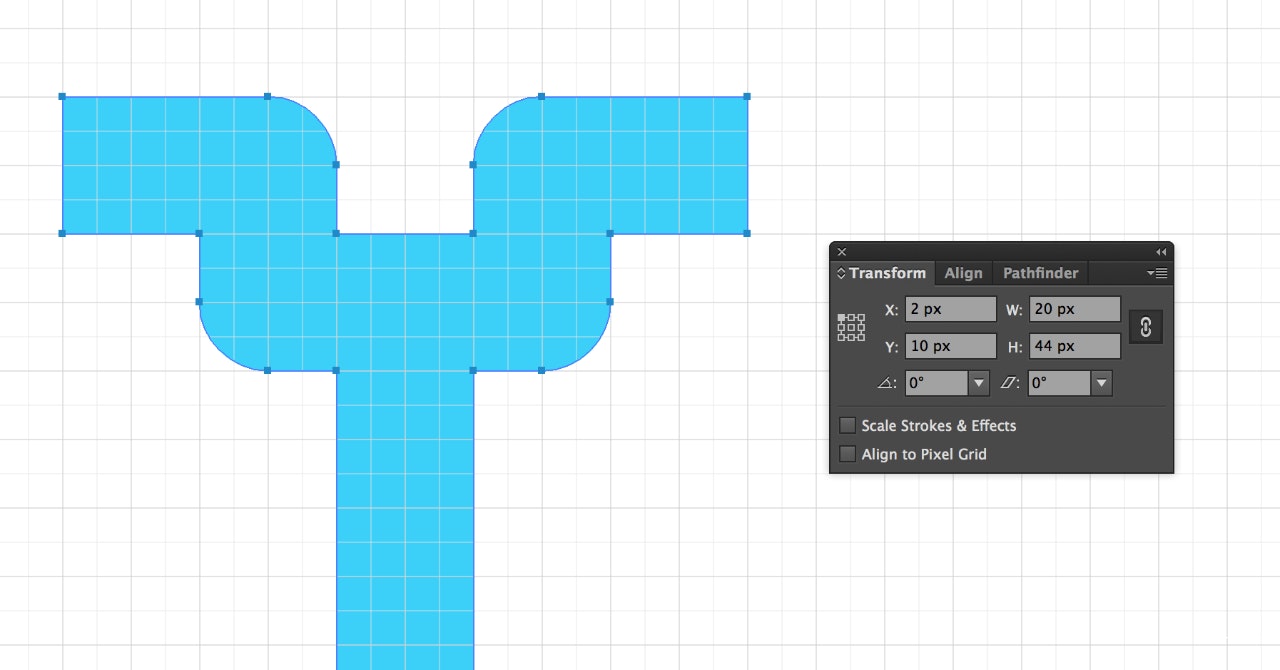
If you intend to serve up imagery with Retina screens in mind, you should always work with even pixel values, and have edges and hard points land on values divisible by 2. With Imgix, you can set the device pixel ratio to serve out an appropriately-sized icon on a Retina display. Having your edges and points on even values will ensure their pixel perfection once rendered to a raster image.
Transparency, gradients, and all manner of complexity are supported with Imgix’s PDF-to-raster conversion. The best way to test out your imagery is just to place it on the server and process it out as a PNG or JPG.

While the number of paths you have in any given page may increase the processing time, it will still be a matter of milliseconds before it is rendered to a raster graphic. We have tested vector illustrations with complex gradients, blending modes, and brush styles without any noticeable loss of quality to the design.
Summary
- For best results, use even pixels and be intentional about the placement of graphic assets
- Complex Illustrator features are supported, and if in doubt about how they may render, experiment
Saving Your PDF Files
To prepare your vector file as a PDF for Imgix, we recommend first saving out your original source Illustrator document. Then go to: File > Save As… > Adobe PDF.
Adobe’s defaults here should suffice, especially if you’re only rendering out vector graphics. If you leave Preserve Illustrator Editing Capabilities checked, it will not hinder imgix’s ability to render out your graphics. You can choose otherwise to decrease file size.

You can place this file in your web directory and it is then ready to be used in coordination with Imgix’s API.
Summary
- Save As > Adobe PDF
- Leave Preserve Illustrator Editing Capabilities for ease of editing
Using Sketch
Here are some basics and best practices for setting up your vector assets using Sketch, by Bohemian Coding.
This application is a bit more specific for graphic tooling, and a lot cheaper than Adobe Illustrator. Sketch makes extensive use of the PDF file format, and is an excellent asset creation tool for vector-to-raster conversion with Imgix.
Document Setup
Compared to Adobe Illustrator, Sketch is a bit more tailored to creating iconography and web graphics. There is very little setup required when creating a new document. The presets and defaults will fall in line with what is desired for web asset creation. The colors are RGB and pixels are used for measurement.
Grid & Units
Under the View menu in the tool bar, you will find a number of options that will help you better set up the grid for working with the document. Here you will be able to toggle your grid, rulers, and various utilities and measurements, as well as be able to adjust your grid values.
Go to View > Grid Settings to pull up the settings for viewing your document. Here, we’ve set the grid to block every 2px, and have a thick line every 1 block. This is to help better place important points and edges on even values.

Show Pixels under the View menu will give you the ability to preview a rasterized version of your graphics at 1-to-1 scale.
![]()
Shortcuts
- Show Pixels: Control + P
- Show Grid: Control + G
- Center Canvas: Command + 1
Summary
- Sketch natively works in RGB and pixels
- Work with even and whole pixels
- Set Grid Settings to 2px and Thick Lines per 1 Block
Using Pages, Artboards, & Slices
Sketch has a number of different ways to prepare artwork for export that will work well with Imgix. Because we intend to export these graphics as multi-page PDFs, there are several ways you can set up your document to accomplish this.
In Adobe Illustrator, the main recommendation for PDF export was to use artboards as a way to save out a multi–page PDF. For Sketch, we recommend that you use pages for different graphics, create artboards around your graphics within the pages, and use the Create Slices from Artboards option.
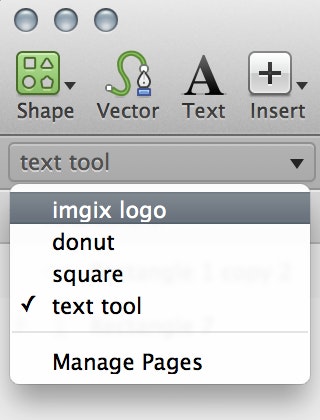
To start, you can create and name a page for each graphic you wish to create. Using the Manage Pages option you can rename and reorganize your graphics within one document.
Next, you can set up your artboard size by using the Artboard tool. The Artboard tool is similar to Illustrator in that it opens up an “Artboard Mode” where you can edit the size of your artboard. This will give you the ability to create a canvas around your work that you can eventually use to create a slice.
You can have multiple artboards on one page, and you can easily browse how your graphics are arranged in each artboard using the layer tree tool on the left.
Summary
- Pages for organizing graphics asset sets
- Artboards within pages to organize graphics
- Use the Layer Tree to track your graphics within pages and artboards
Graphic Placement & Complexity
Always work with even and whole pixel values and understand the placement of your graphics. Keep an eye on your Inspector panel; the origin of every object is set to the top left. Make sure objects are properly oriented and that edges land on whole pixel values for graphic clarity and fidelity during scaling and rasterization.

Any vector effects or gradients will represent well once rasterized by Imgix’s API. Any raster effects that are applied to your graphics will not be lossless or represent well if you intend to scale it larger than 100% of its original size.
Summary
- Vector effects will be lossless for scaling
- Raster effects like Gaussian Blur will not scale up well
Saving & Export
To export your graphics, you can use the Export mode to set up slices. Using the Export tool, you can ready your objects for export. Here you will find the option to either set up your own slices or have them be generated from your artboards.

To export all of your slices to a single multi-page PDF, go to: File > Export Slices as PDF.
PDFs exported out of Sketch are not editable in the same way that an Illustrator file is.
You can place this file in your web directory and it is then ready to be used in coordination with Imgix’s API.
Summary
- Export > Create Slices from Artboards
- File > Export Slices as PDF