Advanced Settings
The Source Details page shows you your Source’s current status and additional settings that can be configured. The Status field should change from Queued to Deployed within seconds of creating your Source. Once this happens, your Source is ready to use.
If you want to adjust the settings on this page, click the Edit button, edit the fields you want to change, and click Review and Deploy to update your Source configuration. Most fields are self-explanatory, but you can hover over the (?) icons to get more detail.

Source modifications will only take effect for new renders. Assets still in the cache will continue to be served with the Source configuration deployed when cached.
To apply your new Source configuration to current images, use the purging functionality or contact support to purge your entire Source.
Changing Source Type
Sources already created as a single Source type can be changed to a different kind at any time. Configuration settings such as the domain, default parameters, default images, and cache TTL settings will remain the same, but you will need to change the respective method of connecting Imgix to your Origin assets depending on the new Source type.
- On the Source Details page, click Edit.
- Open the dropdown menu next to Source Type.

- Select the Source Type that you are switching to.
- Review and implement any specific settings (access keys, base URLs) to successfully redeploy the Source with the new type.
- Click the Review & Deploy button once your settings are configured to redeploy the Source with the new Source type.
Domains
Imgix Subdomains
Specify a subdomain to use in Imgix. The subdomain is the first part of the URL that comes before .imgix.net, and is used to create the base URL for your Source. For example, if you set the subdomain to example, the base URL for your Source will be https://example.imgix.net.
Custom Domains
You can add a custom domain as the base URL for your Source. Both the standard subdomain and the custom subdomain will resolve to the same Origin Image.
- On the Source Details page, click Edit.
- Under “Domains”, click Custom Domain (on mobile devices, click Add Domain first).
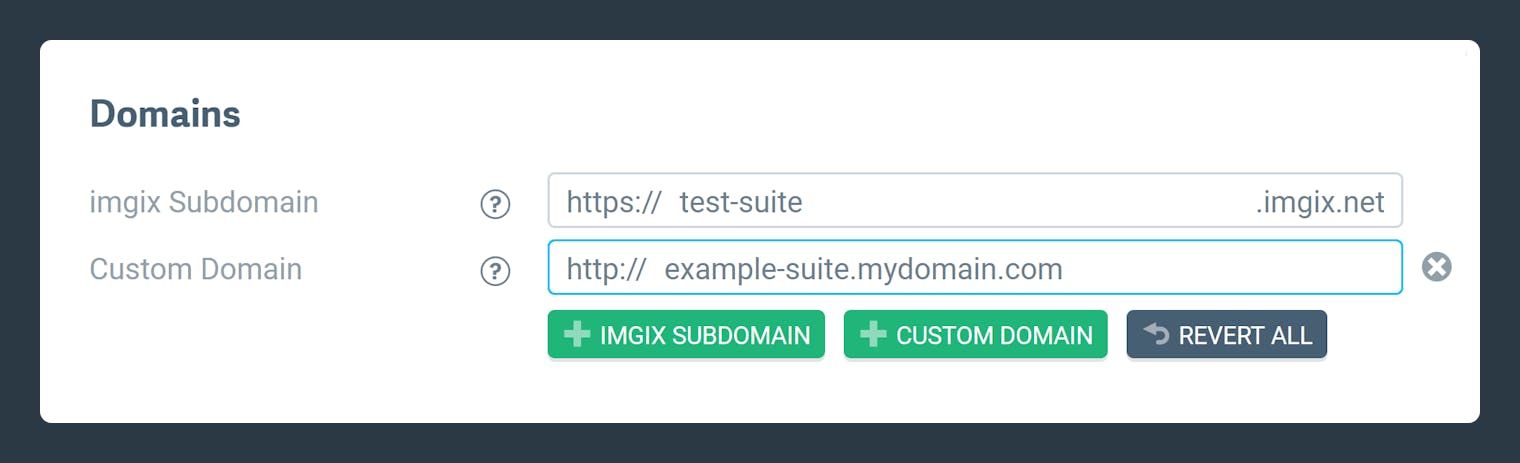
- Enter the custom subdomain you’d like to use and click the Review & Deploy button to redeploy your Source with the new custom domain.
- Go to your DNS registrar and configure your DNS settings to ensure that the CNAME points to the new
*.imgix.nethostname, where*is the subdomain of the Source you’re using in Imgix. See the example of the CNAME record setup in Google Domains below.
- Wait until the DNS propagates your new changes. Depending on your DNS provider, this can take up to 24 hours.
All standard hostnames powered by Imgix (e.g., subdomain.imgix.net) automatically support secured transport (SSL/TLS).
Note: By default, the custom subdomain can only be used with HTTP. Using HTTPS requires an SSL certificate through our CDN partner.
Please contact your Account Manager or contact Support to set this up. For more detailed information, see the the SSL documentation.
Asset Manager Processing Rule
When Asset Manager crawling is enabled, the Asset Manager Asset Rule specifies which folders you want included or excluded from your Asset Manager. This controls which assets are shown in Asset Manager.
The default behavior is set to crawl all media and subdirectories in your Source’s base path prefix.
Asset Defaults
Your Source comes equipped with some basic error-proofing, allowing you to set an image that appears in place of a missing asset or one with an error. This way, even if the asset has a problem, it will not appear blank. When using the Rendering API to serve an image, you can apply parameters from the original request to the default or error image.
To add either a default image or an error image:
- On the Source Details page, click Edit.
- Under “Image Defaults,” click on the appropriate field and enter the URL for your image.

- If you want to apply the defaults from the original image request, click the check box under the image field.
- Click the Review & Deploy button to redeploy your Source with the new settings.
The Default Image and the Error Image settings have different behaviors that may affect your usage quotas. Continue reading below.
Default Asset
If a Default Image is set, it will change the behavior of 404’s for your Source. When this is enabled, any request that would typically result in a 404 will instead return a 200 response along with the image you’ve specified.
This is useful if you rely on receiving a 200 response along with a default image on every request, regardless of whether or not an image exists.
If Default Image and Error Image are configured, Default Image will override Error Image whenever a request would result in a 404 error.
Credit Consumption Warning
Using the Default Image setting will cause all requests for missing assets to count against your credit consumption since they return a 200 response.
Error Assets do not count towards your usage quotas.
Since a 404 will return a default image instead of an error response, we recommend using a default image with a small filesize to prevent large bandwidth usage from requests that result in a 404.
Error Asset
If Error Image is enabled, Imgix will continue to return the appropriate error code for assets that generally result in an error (4xx, 5xx, etc.) while returning the image specified in your Error Image configuration.
Unlike Default Images, the error response is preserved. Any asset that triggers an error image to display will not count against your quota, including 404s.
If Default Image is enabled, it will override your Error Image setting whenever a request results in a 404 error. In this scenario, the response will be converted to 200, which will count against your monthly usage quotas.
Note: If you have configured an error image and need to change or remove this setting, it may take up to 6 hours for the change to take effect. If you need it cleared faster, please contact support@imgix.com.
Parameter Defaults
If you have a baseline level of image optimization you’d like to apply to all of your images, you can specify default parameters at the Source level.
Note: ch cannot be set as default parameters due to how it interacts with our caching infrastructure.
- On the Source Details page, click Edit.
- Under Image Defaults, choose a parameter from the dropdown menu and provide the value. Add as many parameter/value pairs as possible to set your defaults.

- Click the Review & Deploy button to redeploy your Source with the new settings.
Default parameters will cause all images in a Source to go through our Imgix rendering service. This will disable the default functionality for serving images as pass-throughs. If you are serving PDFs or omitting parameters to serve images in their original quality/size in your Source, applying default parameters will affect the default behavior of those assets.
For more information about default parameters, how to override them, and recommended uses, check out this blog post.
Asset Cache Settings
Your cache settings determine how long the assets and derivative images generated by Imgix will live in the end user’s browser cache. We recommend setting the TTL (or “time-to-live”) value to at least one year since the Origin Images are unlikely to change. This way, the assets are more likely to be served from the user’s local cache instead of being regenerated from the Origin Image or served from intermediate caches in the Imgix system, giving users faster page loads and lowering bandwidth costs.
The maximum value for the Default Cache TTL is one year. The minimum value is 30 minutes.
For more information on TTLs, see Wikipedia.
The Cache TTL Behavior dropdown determines how Imgix interacts with any Cache-Control: max-age headers on your Origin Images. It has three options with corresponding TTL values:
- Respect origin: Respects the
Cache-Control: max-ageheader if present and applies one with the Default Cache TTL value if not present. - Override origin: If a header is present, it overrides the
Cache-Control: max-ageheader with the Override Cache TTL value or applies one with that value if it is not present. - Enforce minimum (default): If a header is not present, a
Cache-Control: max-ageheader with the Minimum Cache TTL value is applied; if the existing header’s value is lower than the Minimum Cache TTL value, it is overridden.
The default setting of Enforce Minimum: 5184000 seconds (60 days) is recommended for most use cases. This setting ensures that assets are cached for a long time, improving performance while decreasing your credit usage.
In addition to setting the default behavior and value for asset caching, you can also set a Cache-Control: max-age header for the default error image (if you have set one). This value should be short so that the error image doesn’t continue to display after the error has been resolved.
Here’s how to set your TTL values.
- On the Source Details page, click Edit.
- Under “Cache Settings”, choose the Cache TTL Behavior you prefer from the dropdown.

- Type in a time value for the TTL you want to change and choose the time units from the dropdown menu.
- Click the Review & Deploy button to redeploy your Source with the new cache settings.
We will do our best to cache your assets and derivative images as long as you specify. However, the sheer number of possible image permutations that Imgix enables you to create makes it impossible to cache all your derivative images forever, ideally.
At times, we may evict image derivatives from the cache and re-render them as necessary. We will not bill you for derivative images that are evicted and re-rendered before the lesser of their intended cache timeout or 30 days.
We also recommend setting Cache-Control: max-age=86400 headers on all assets when you add them to your asset storage. This will help reduce cache misses for files that Imgix doesn’t process (like CSS) and also prevent it from re-fetching assets it does process from Origin. If you need to update files that are already there, you can run a script like s3cmd (for Amazon S3) to set the header after uploading.
For more information on general caching strategy and its interaction with Imgix, see our Fingerprinting Images guide.
Video Cache TTL
The Video Cache TTL controls how long processed video assets — including HLS manifests, transcoded MP4 files, and generated VTT subtitle files — are cached. This is a separate setting from the image cache TTL and applies only to video output.
It uses the same enforce-minimum behavior: if no Cache-Control header is present, the configured TTL is applied; if the existing header’s value is lower, it is overridden.
The default value of 7776000 seconds (90 days) is recommended for most use cases.
Render Settings
The Render Settings section controls what rendering capabilities are enabled for your Source when using the Rendering API.
When a rendering capability is disabled, any parameters associated with that capability will be ignored when used with the Rendering API.

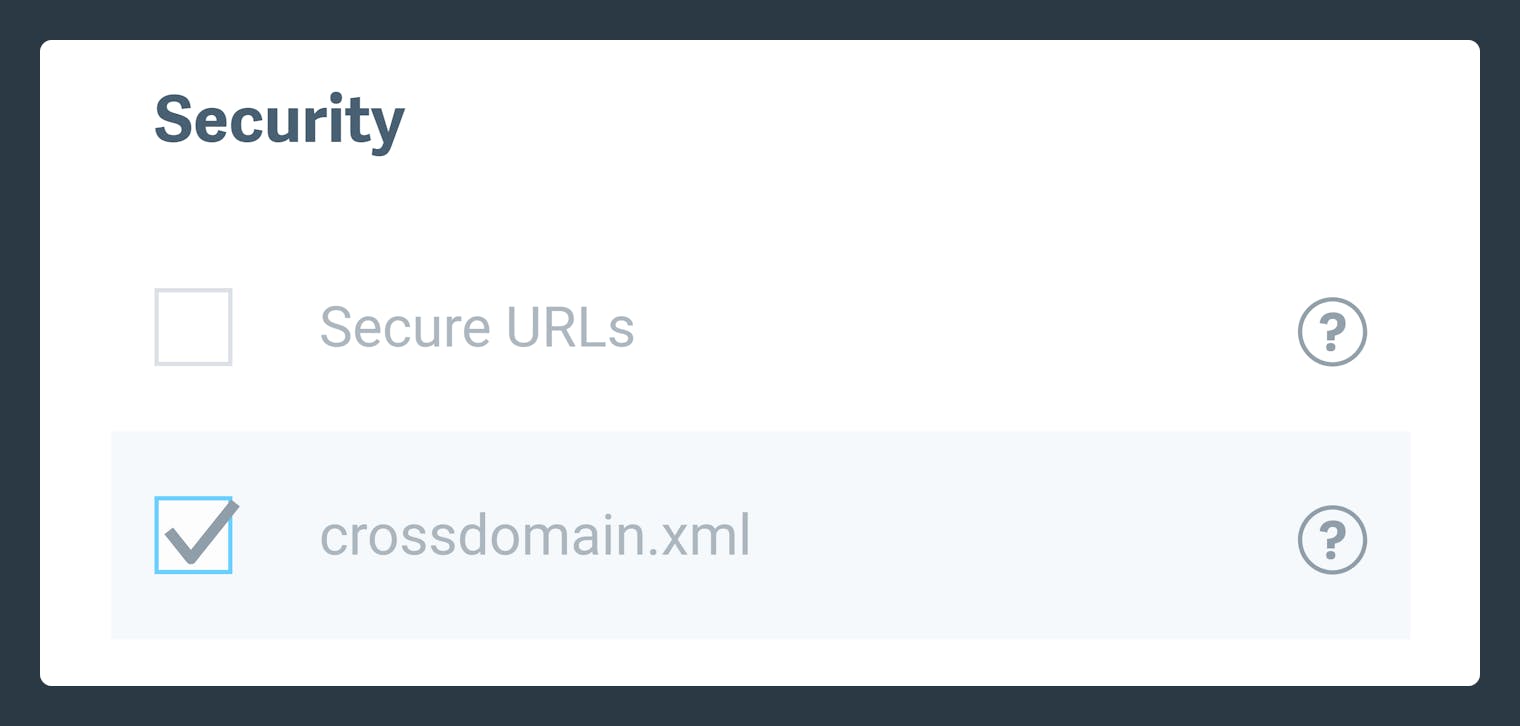
Asset Security
Secure URLs
Secure URLs are a way to protect your images from being accessed by unauthorized users. When you enable secure URLs, Imgix will sign your image URLs with a token that expires after a set period.
Secure URLs require additional configuration to work correctly. For more information, see the Securing Assets guide.
Cross-Domain Policy File
If your website or app requires a Cross-Domain Policy file to serve your assets across domains correctly, you can enable it in the Dashboard by clicking the check box under Security settings:
When enabled, Imgix will serve the following file to any client that requests it:
<?xml version="1.0"?>
<!DOCTYPE cross-domain-policy SYSTEM "http://www.adobe.com/xml/dtds/cross-domain-policy.dtd">
<cross-domain-policy>
    <site-control permitted-cross-domain-policies="all" />
    <allow-access-from domain="*" secure="false"/>
</cross-domain-policy>
robots.txt
The robots.txt file can be found at your Imgix domain path, /robots.txt (e.g., yourimgixsubdomain.imgix.net/robots.txt).
This file controls how search engine crawlers interact with your assets. Possible values are:
- Origin: Passes through the
robots.txtfile from your Origin based on the path prefix configured for your Source - Allow All (default): Tells crawlers that they can access all assets
- Disallow All: Tells crawlers not to access any assets
Note that the robots.txt file is only used for crawlers that respect the robots.txt standard. It does not prevent unauthorized access to your assets.
Changes made to the robots.txt take approximately ~5 minutes to update.
See this Google resource to learn more about robots.txt.
Disabling, Enabling, or Deleting a Source
You can temporarily disable a Source if you no longer want it to serve assets, or re-enable it at any time. If you no longer need a Source, you can permanently delete it. By hovering over the settings icon at the top of your Source view page, you can disable, enable, or delete a Source. The option to disable/enable/delete will be revealed depending on the current Source status.

Disabling a Source
Disabling a Source immediately prevents it from serving assets. Any requests for specific asset paths on that Source will return an error response until the Source is re-enabled.
Enabling a Source
Re-enabling a previously disabled Source restores its ability to serve assets at its assigned Imgix domain.
Deleting a Source
Deleting a Source permanently removes it from your account. Once deleted, the Source configuration cannot be recovered, and the associated Imgix domain will no longer serve assets.
Disabled/Deleted Source Interactions
A disabled or deleted Source will continue to serve assets from the cache until the assets TTL expires or unless they are purged.
Disabling a Source does not delete your underlying origin data. It only prevents Imgix from fetching and delivering assets from that Source.
Deleting a Source does not delete your assets from your origin storage provider. It only removes Imgix access and configuration.
Root Imgix URLs
Root Imgix URLs (for example, https://your-source.imgix.net/) will continue to resolve regardless of whether a Source is enabled or disabled. However, when a Source is disabled, requests for specific asset paths (for example, https://your-source.imgix.net/image.jpg) will return an error response.
This means:
- The base domain will still respond.
- Asset delivery is controlled by the Source’s active status.
- Re-enabling the Source restores normal asset delivery without changing the domain.
If you are troubleshooting delivery issues, ensure the Source is enabled in the Imgix dashboard before investigating origin configuration or URL formatting.